Accessing an Edge iNode Console
- 06 Sep 2024
- 3 Minutes to read
- Print
- DarkLight
Accessing an Edge iNode Console
- Updated on 06 Sep 2024
- 3 Minutes to read
- Print
- DarkLight
Article summary
Did you find this summary helpful?
Thank you for your feedback
This article gives instructions for accessing the Edge iNode console using the iNode command-line interface (CLI) or the iNode web UI. To access an Edge iNode console, you need the IP address of the Edge iNode's network 2 Ethernet interface (eth1). By default, this address is set to 192.168.192.168.
Access an Edge iNode Console using the iNode CLI
Connect to the Console
To use the command-line interface to access an Edge iNode console, follow these steps:
- Start by setting the IP configuration of your laptop/computer. If the iNode's network 2 Ethernet interface is using the default IP address of 192.168.192.168, choose an unused IP address in the range 192.168.192.2 through 192.168.192.254 for your laptop/computer.
- Connect your laptop/computer to the network 2 Ethernet interface of iNode using an Ethernet cable.
SSH into the Console
Using SSH key authentication
- Use a Secure Shell (SSH) to connect to the Edge iNode using its IP address. Use the -i privatekey option to specify your SSH private key. (If no SSH key has been associated with the iNode, see Managing SSH Key Authentication for an iNode for instructions.)
For example:>ssh -i /home/mycompanykeys/inode1keyfile [email protected]If you’ve set a passphrase to use with the SSH key, you’ll be prompted to provide the passphrase. - When you’ve logged in successfully, the CLI prompt appears.
Using password-based authentication
If you’re currently using password-based authentication for accessing the iNode console, for now you can continue to do so. However, future releases will deprecate password-based authentication and require configuration and use of SSH key authentication. Hence, we recommend you start using SSH key authentication now. See Managing SSH Key Authentication for an iNode for instructions.
- Use a Secure Shell (SSH) to connect to the iNode using its IP address.
>ssh [email protected] - Use the default username for an iNode, which is iotium. The default password varies depending on how and when you received the iNode:
- iNodes shipped from the factory have the default password iotium123.
- iNodes that we have already configured in advance of shipping have had their default passwords changed. iNodes configured in 2017 or 2018 have the default password admin123. iNodes received in 2019 have the default password C7ML5MTIWI.
- When you’ve logged in successfully, the CLI prompt hostname> appears.
Access an Edge iNode Console using the web UI
The iNode’s uplink setting can be configured using a web UI. This can be used for common settings instead of the CLI.
Note
The iNode Configuration UI is only available on iNodes with nodeOS 3386.1.41 and later. The Web UI will be available on newly shipped iNodes (after September 4th, 2024). iNode currently in-service will be updated with this functionality at a later date
To access the iNode web UI, complete the following steps.
- Connect the iNode WAN port to the network.
- Connect your computer to another available port on the iNode. (Refer to the printed documents included in the box with the iNode for port mapping information.)
- Set the IP address information on your computer to be on the same network as the iNode Management Interface. The Management Interface is at IP 192.168.192.168.
- Use the following details to configure the network interface connected to the iNode on your computer.
- IP: 192.168.192.2 through 192.168.192.254.
- Subnet Mask: 255.255.255.0
- Gateway: 192.168.192.1
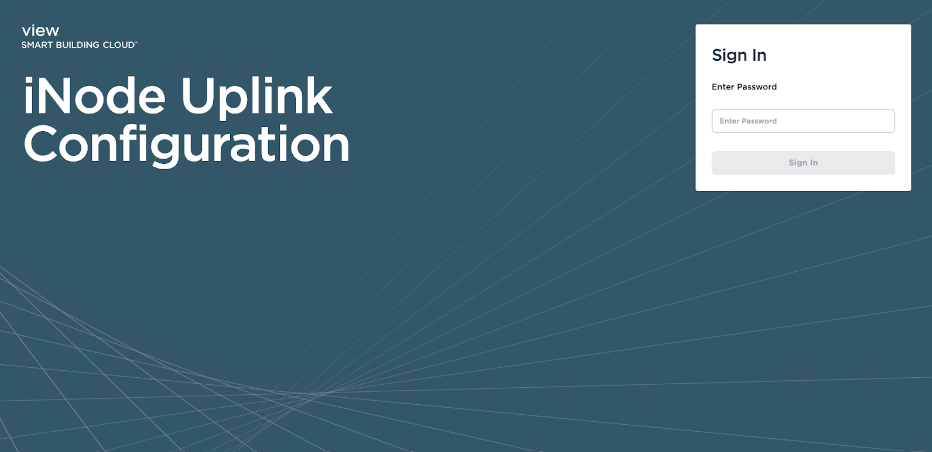
- Open a web browser and navigate to 192.168.192.168:8443. The following page should load.

- Enter the password. The initial password is the iNode serial number. Refer to the serial number label on the iNode.NoteIf the iNode is not new and has previously connected to the Secure Edge Portal, the password will not be the serial number. Use the existing password in this case.
Once the password is accepted, you will have access to the configuration options.

Refer to these articles for more information on how to configure each parameter:
Was this article helpful?


