Creating a Custom Service
- 11 Jun 2024
- 1 Minute to read
- Print
- DarkLight
Creating a Custom Service
- Updated on 11 Jun 2024
- 1 Minute to read
- Print
- DarkLight
Article summary
Did you find this summary helpful?
Thank you for your feedback
If you want to use a service not available in the Marketplace, you can create a custom service.
Before you start, confirm the following:
- The Edge or Virtual Edge iNode has been deployed.
- You have a custom pod specification.
- At least one additional IP Address is available from the Internal Reserved IP Address pool. (To find this range, go to the iNode TAN Networks tab and select the pencil edit icon for the listed network. The IP address for your new service is allocated from this reserved pool.)


Deploy a Custom Service
To deploy a custom service, you need to use the Secure Edge Portal to:
- Add a custom pod specification.
- Deploy it on the Edge or Virtual Edge as a custom service.
To create a custom service, follow these steps:
- Log in to the Secure Edge Portal and select the Edge iNode where you want to deploy the service.

- On the Services tab, select the + icon to add a custom service.

- In the pop-up window, select Custom.
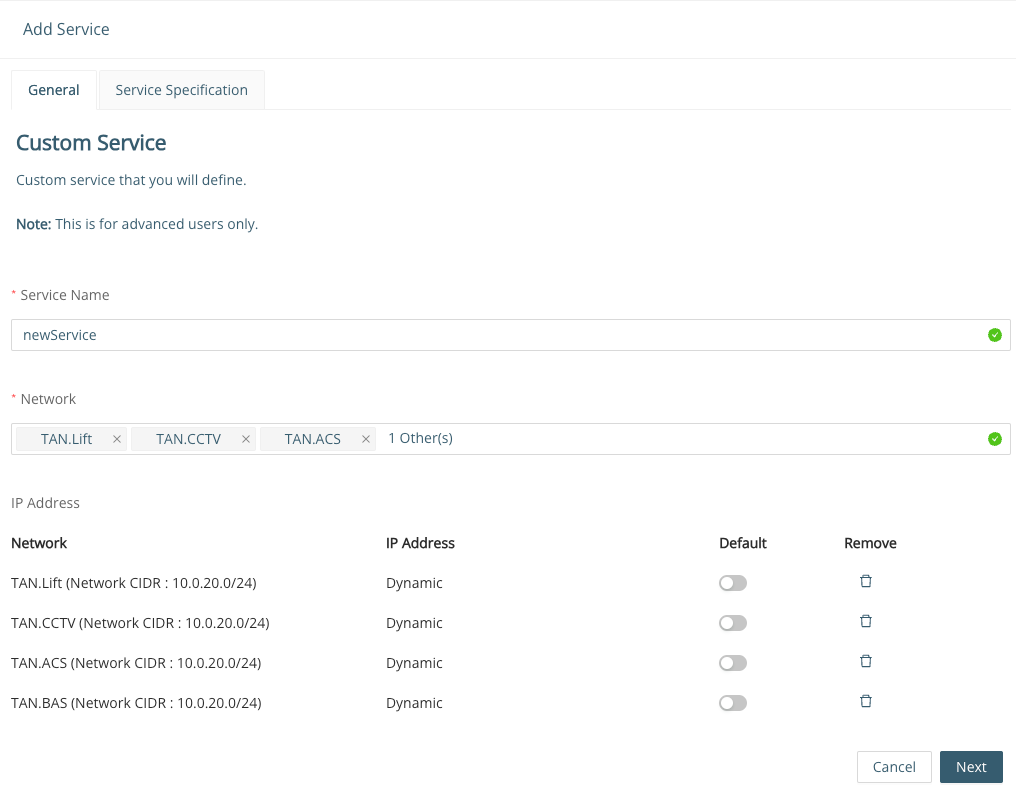
- Enter the service name and select TAN Network from the drop-down menu. To associate the service with multiple networks, you can select more than one network from the dropdown list.
Populate the IP address information for each network selected. If the Network has dynamic addressing, the service will acquire an IP address from the DHCP server. If the network has static addressing, you will need to populate an IP address from the reserved range, as defined in the network configuration.
If multiple networks are selected, you can define a default network. The default network is the network that carries non-TAN native traffic, i.e., traffic to an app behind the Virtual iNode or traffic to the internet.
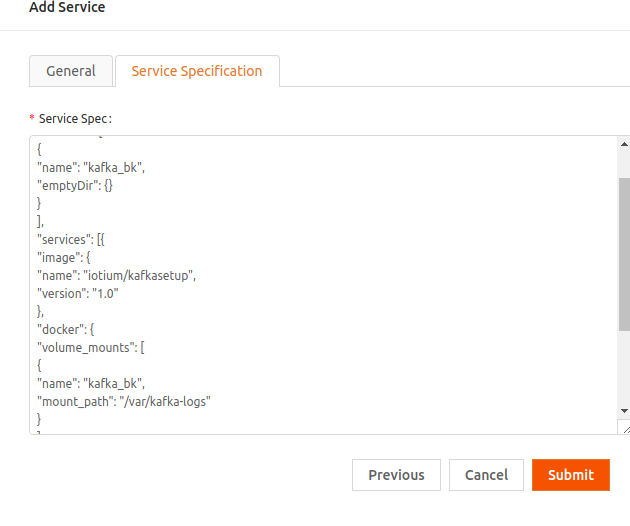
- On the Service Specification tab, copy and paste the custom pod spec into Service Spec box. Remove any extra spaces in the beginning before the opening brace { and at the end after the closing brace }.

- Select Submit. You'll see a status message. Select OK to proceed.

- Once it has been deployed successfully, the new service is listed on the iNode Services tab. To see the services log, select the page icon under Action.

Access the Newly Installed Service
After you’ve deployed the new service successfully, you can use the IP address of the service to access it and get additional information. You’ll find the IP address of the service on the Services tab.
Was this article helpful?


