- 01 Aug 2023
- 6 Minutes to read
- Print
- DarkLight
Using Alerts
- Updated on 01 Aug 2023
- 6 Minutes to read
- Print
- DarkLight
You can set up to alerts to be notified when an event matching a specific condition is triggered. When you set up an alert, you define the condition that will be evaluated for the target resource. The notification is sent when the condition you defined is met.
For example, you can set a trigger to notify you when an iNode is unreachable for more than three minutes. When an iNode has been unavailable for that period, you receive an alert notification.
There are two ways to set up and receive alerts. You can set them up through the Secure Edge Portal and receive notifications through email. Alternatively, you can set up alerts through webhooks and receive programmatic notifications.
You can set up alert notifications for all target resources in an Org, or select the target resources at a specific iNode level.
Managing Webhooks
You can set up alerts to be notified when an event matching a specific condition is triggered. This section describes how to add webhooks, which is required in order to receive alert notifications using Webhook.
Adding Webhooks
To add a webhook, do the following steps:
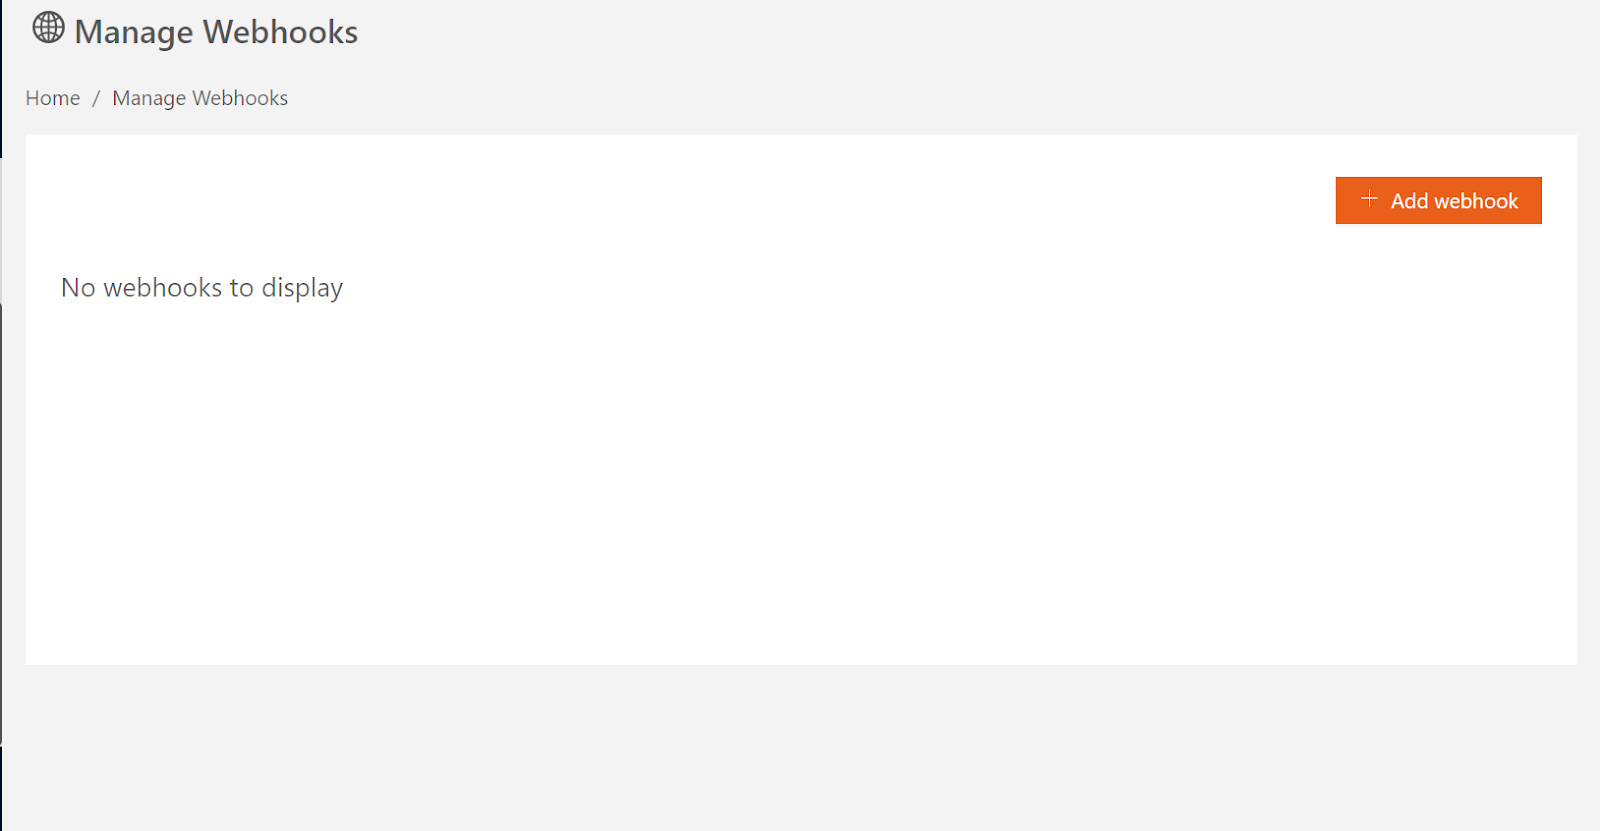
- On the Manage Webhooks page, click (+) Add webhook.
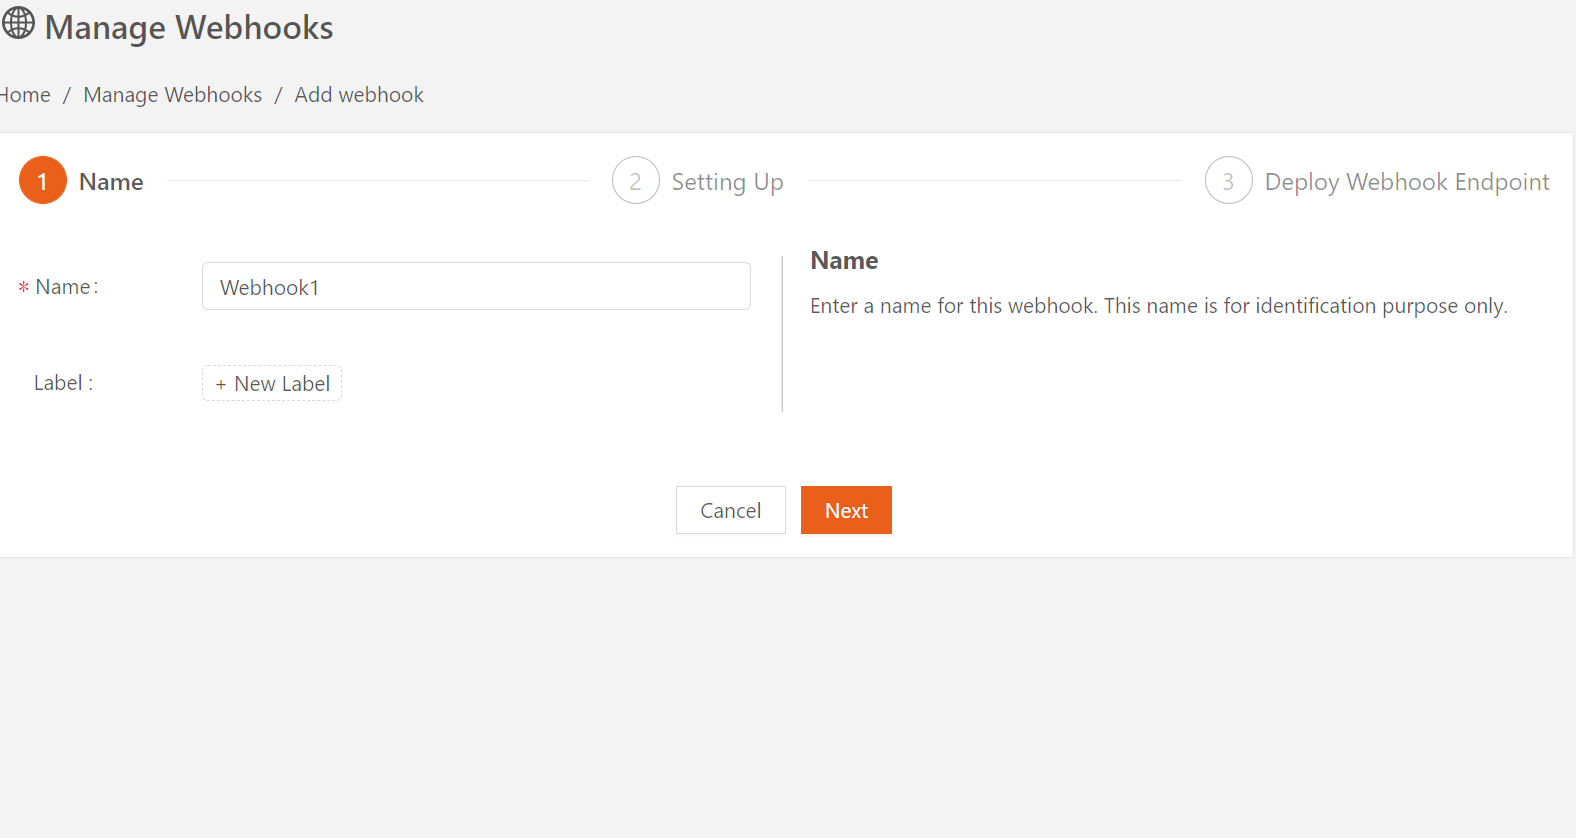
- Enter a name for this webhook, then click Next.
- Specify the webhook’s HTTPS URL and secret.
Optionally, add additional HTTP request headers to include (up to 3) when calling the webhook.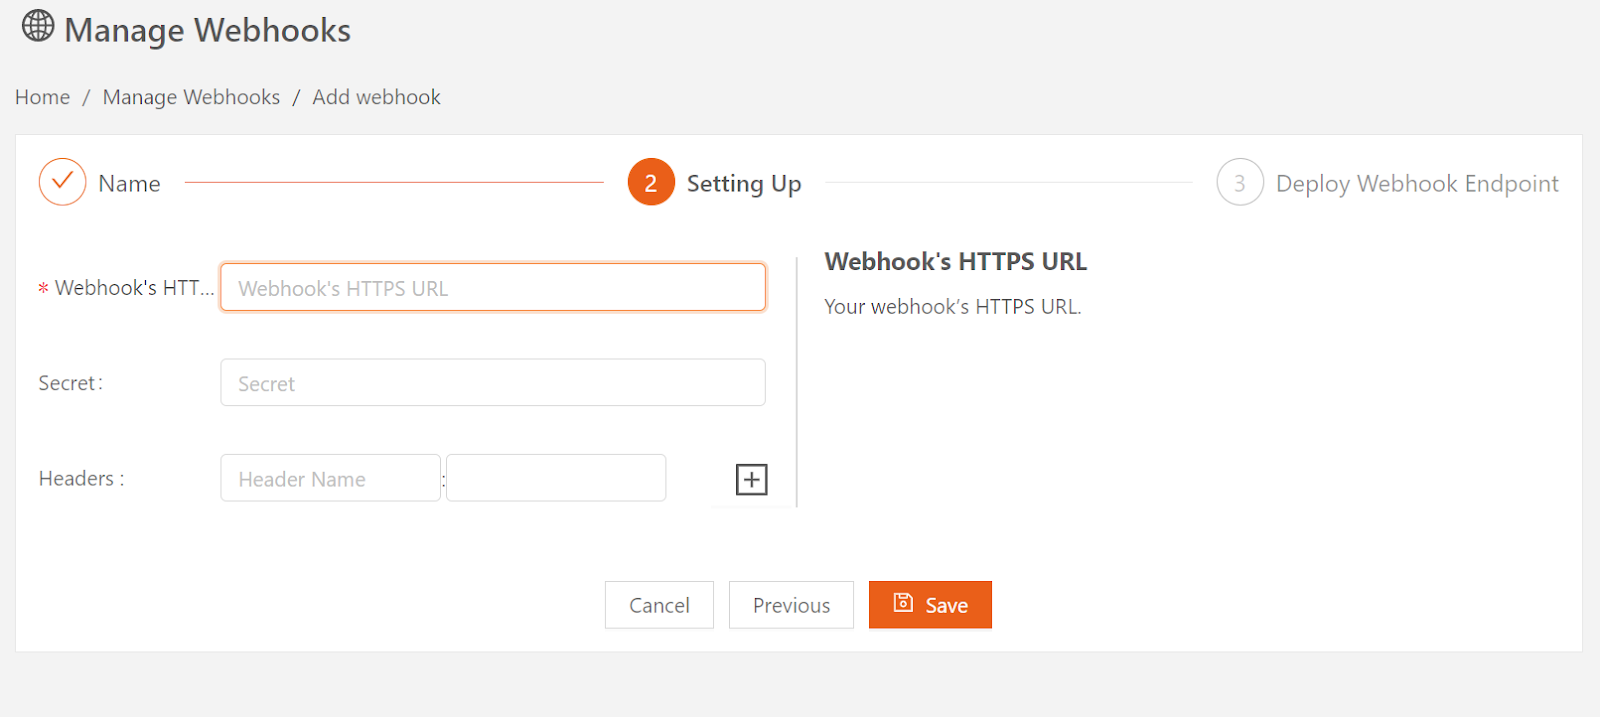
- Click Save to create the webhook.
Verifying and Testing Webhooks
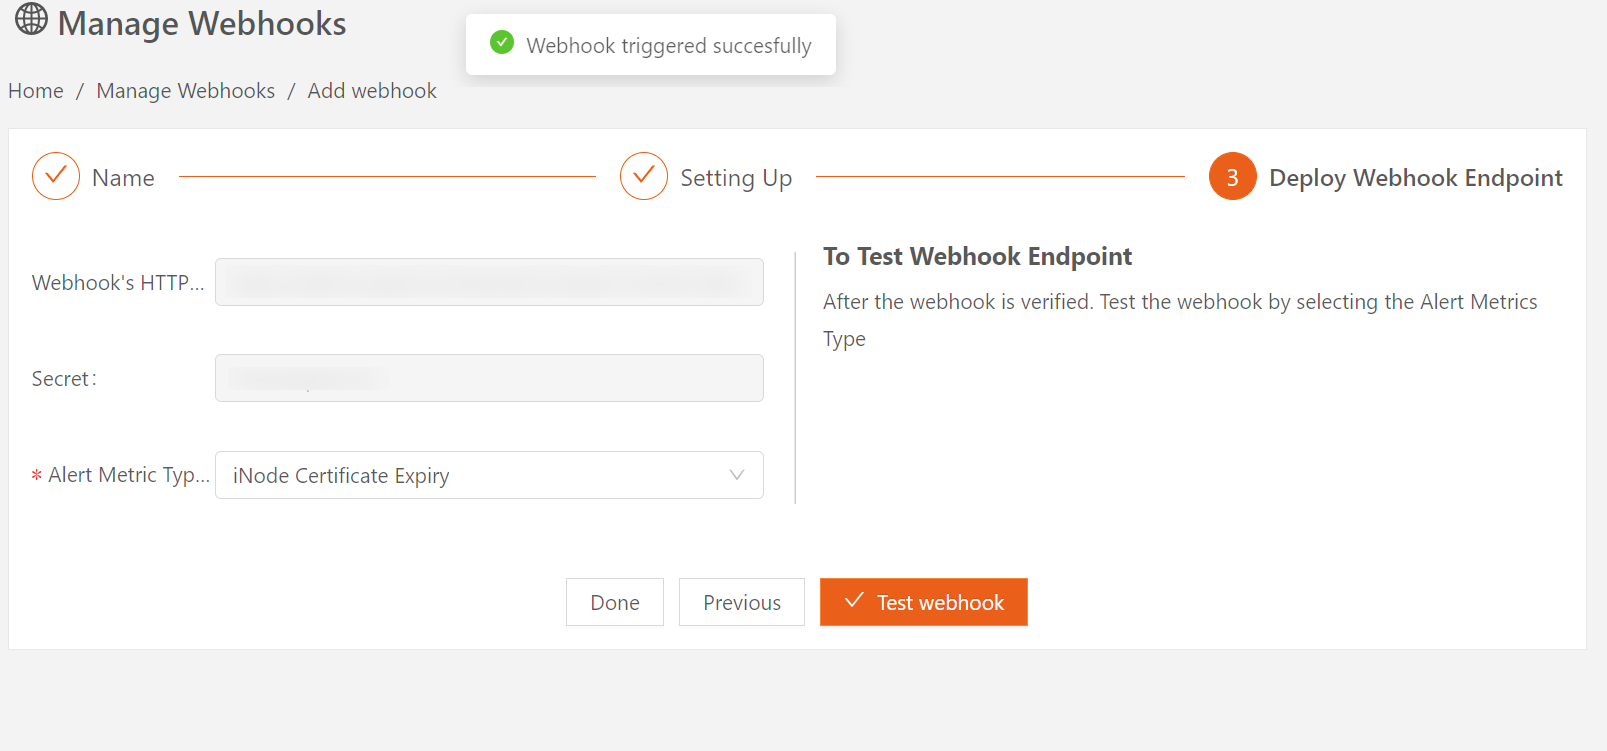
- Verify the webhook, so that it will appear in the Alerts subscription list. To verify a webhook, click Verify webhook.
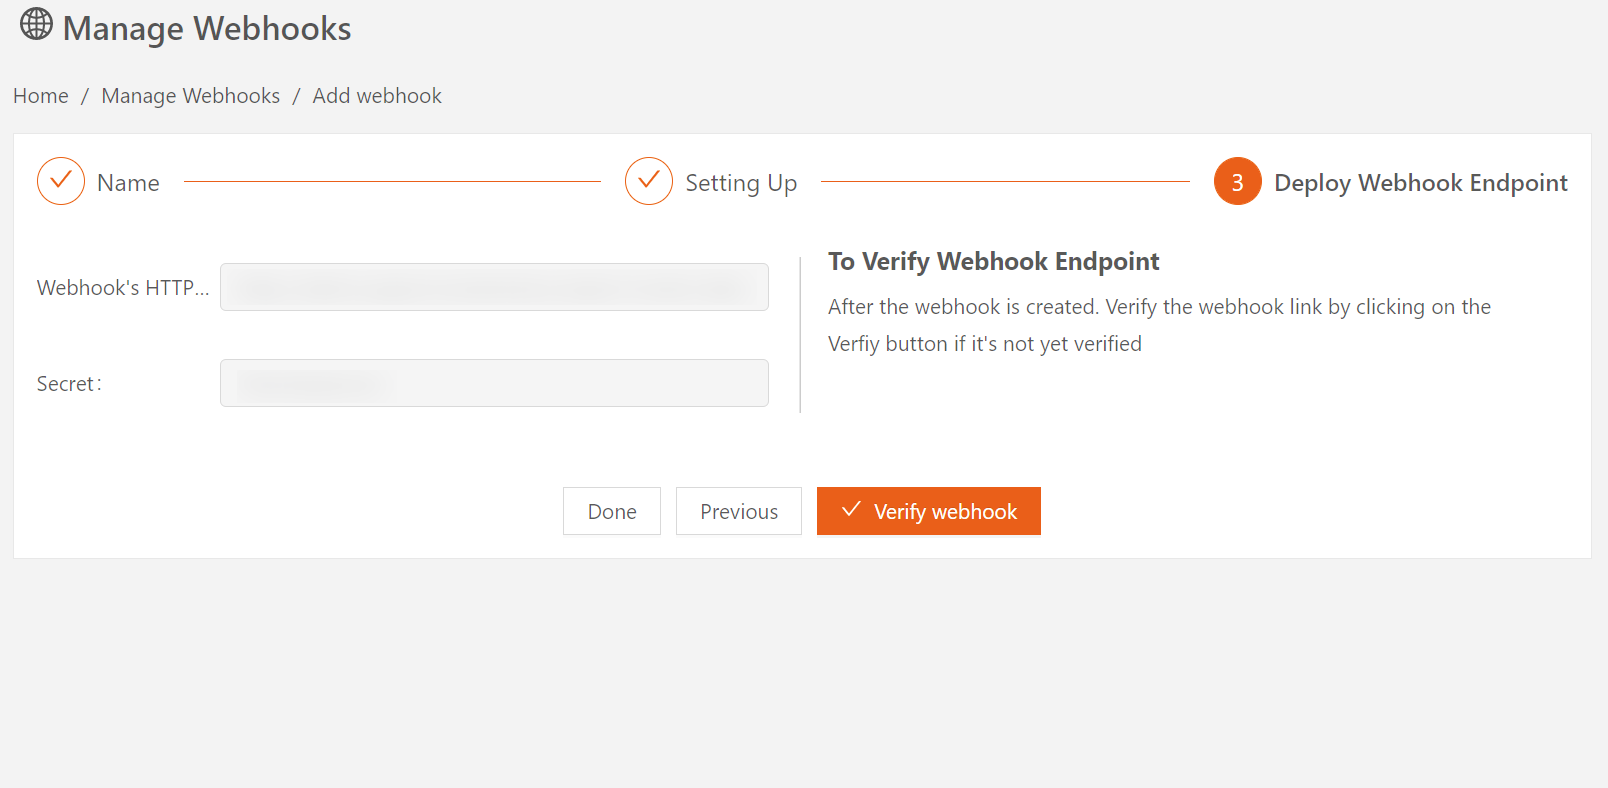
- Test a verified webhook before associating it with an Alert notification. To test a verified webhook, click Test webhook.
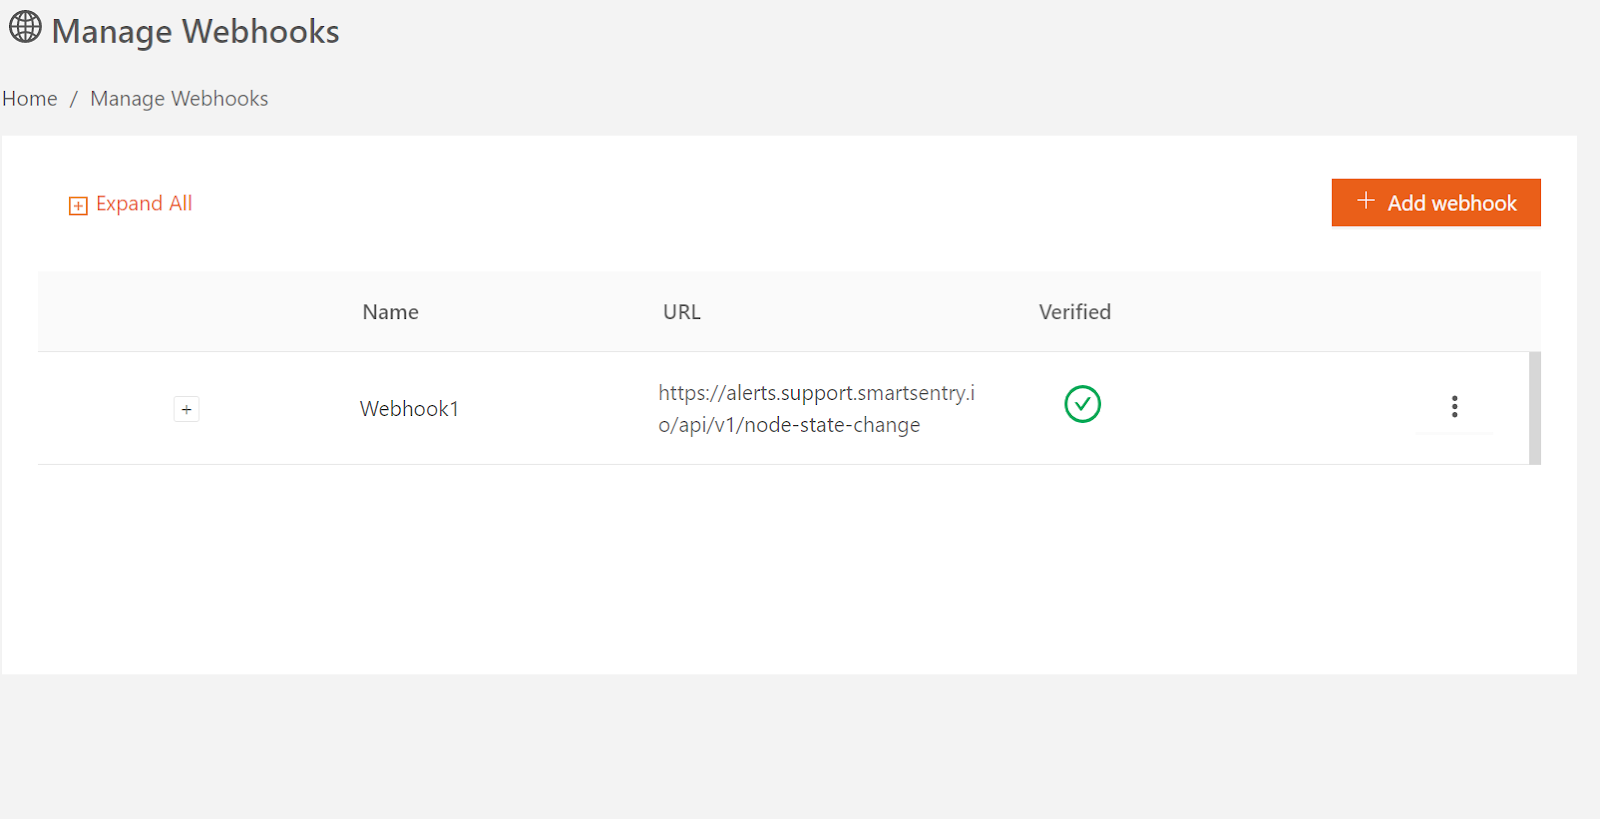
 After you add and verify a new webhook, it appears on the Manage Webhooks page.
Alert Conditions
You can set up alerts for events matching the conditions described in the following table.
Table 2. Alert Conditions
| Metric | Applicable to (target resource) | Condition |
|---|---|---|
iNode Status | All iNodes in the Org or group of iNodes based on the label or a specific iNode. | iNode status ALIVE or UNREACHABLE for more than a specified period. Default is 5 minutes.
|
Remote Network Connection Status | Remote network connections for all iNodes in the Org, or, remote connections for groups of iNodes based on the label; or for a specific iNode, all remote network connections or a specific remote network connection. | Remote network connection status CONNECTED or TERMINATED for more than a specified period. Default is 5 minutes.
|
Service Status | Service status for all iNodes in the Org, or, service status for a group of iNodes based on the label; or for a specific iNode, all services or a specific service. | Service status HEALTHY, UNHEALTHY, or TERMINATED for more than a specified period. Default is 5 minutes. See Edge Services for more information about service status. |
Standalone Mode Expiry | All iNodes in the Org or a group of iNodes based on the label, or a specific iNode. | iNode (or iNodes) operating in standalone mode and the standalone mode has expired or will expire soon.
|
iNode Certificate Expiry | All iNodes in the Org. | iNode (or iNodes) certificate expired or will expire soon.
Note that when an iNode is connected to Secure Edge Portal, it renews its certificate automatically without you taking any action and the certificate expiry alert won’t be triggered. |
iNode IP Address Change | All iNodes in the Org or a group of iNodes based on the label, or a specific iNode. | iNode’s public or private IP address changes and does not change again for more than a specified period. Default is 5 minutes. |
iNode Upgrade Status | All iNodes in the Org or a group of iNodes based on the label, or a specific iNode. | Upgrade status of an iNode SUCCESSFUL or FAILED.
|
iNode Metrics | All iNodes in the Org or a group of iNodes based on the label, or a specific iNode. | The iNode's CPU, memory, or file system usage goes above the configured monitoring level and doesn’t fall below the limit for more than a specified period. Default is 5 minutes. |
Duplicate Address Detection | All iNodes in the Org or a group of iNodes based on the label, or a specific iNode. | Duplicate Address status of an iNode DETECTED or RESOLVED.
|
| Continuous Threat Detection | All iNodes in the organization, a group of iNodes based on label, or a specific iNode. | Threats detected on an iNode.
|
Setting Up Alerts
To set up an alert, follow these steps:
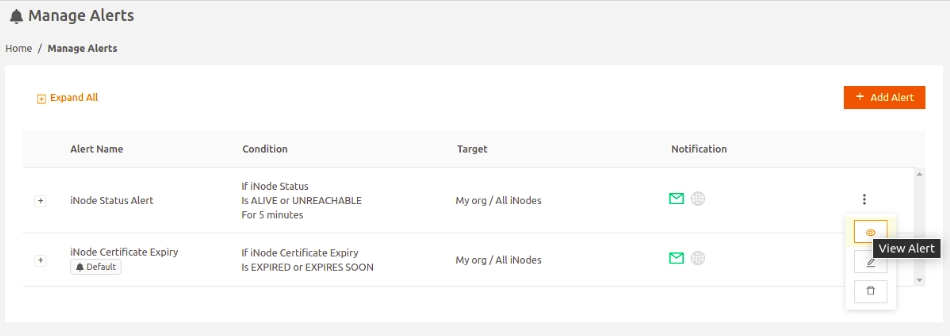
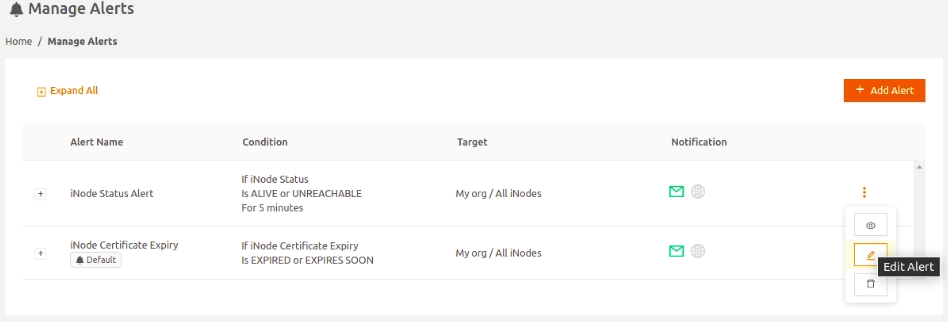
- On the bottom of the Secure Edge Portal left menu, select My Account (person icon) > Manage Alerts. The Manage Alerts page displays a table of all your alerts.
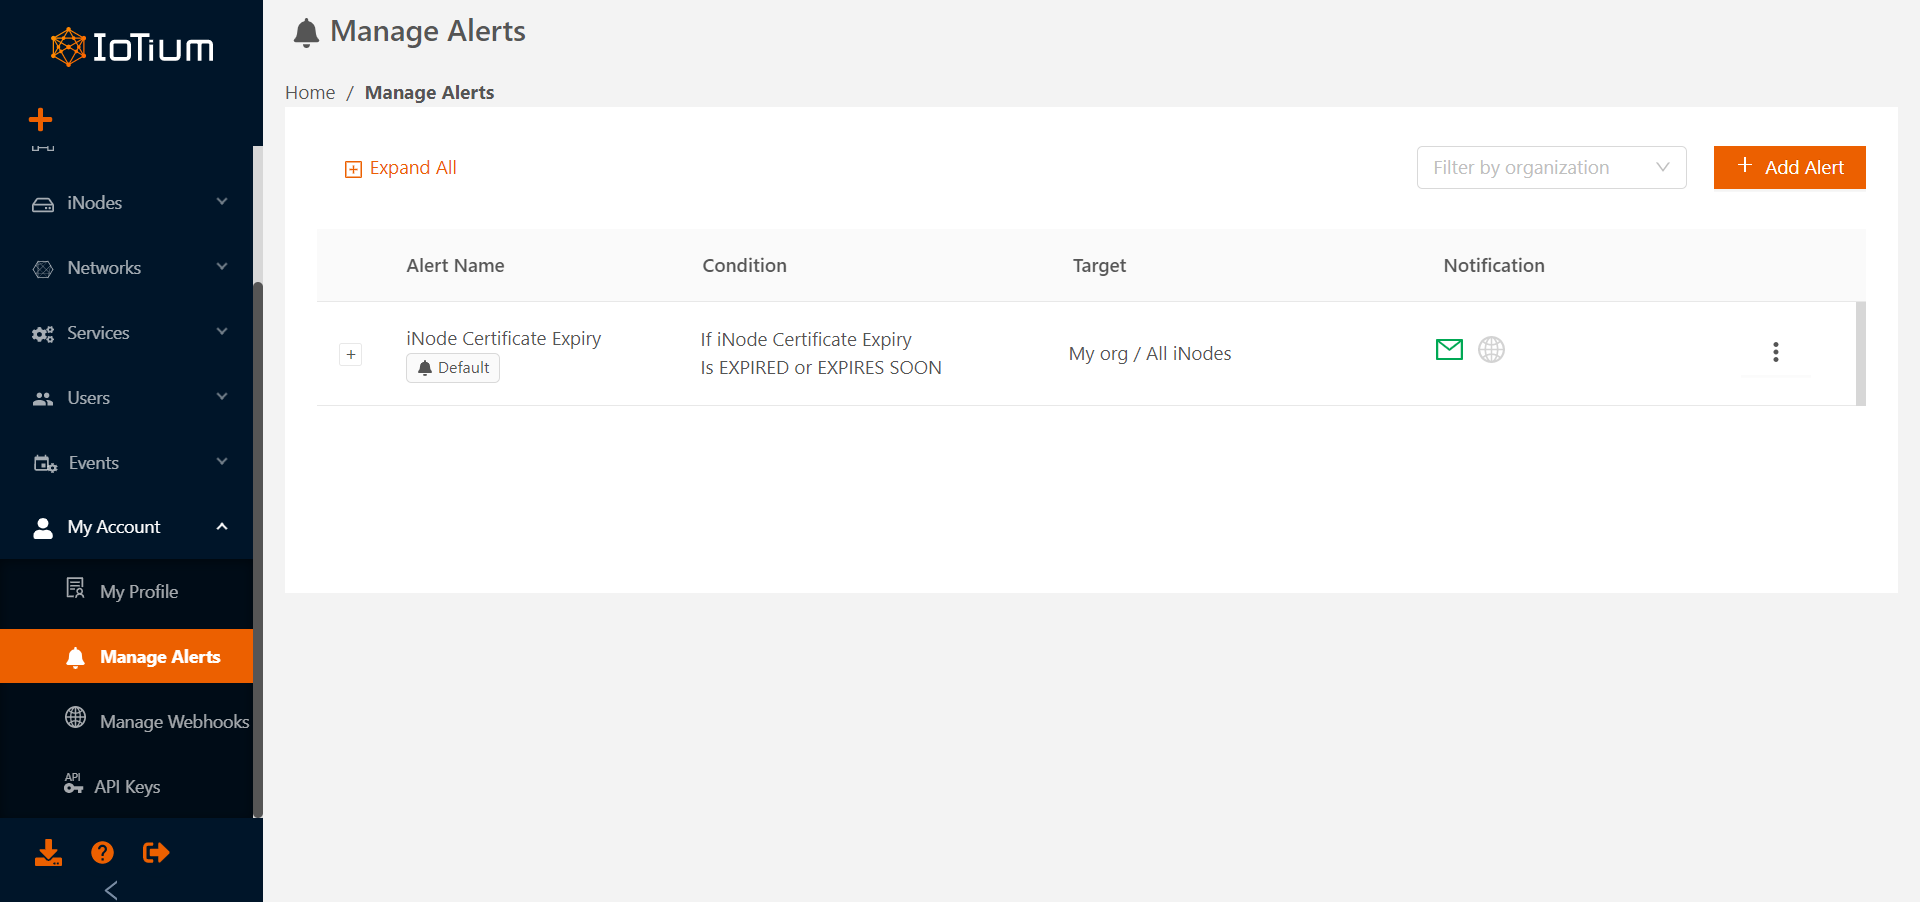
- On Manage Alerts, select Add Alert to add a new alert. Enter the name for the alert. If you wish, you can specify any custom attribute as Label.

- Select Next to specify the condition (metric) to be met to trigger the alert notification.
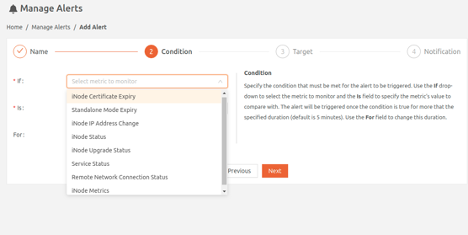
Use the If drop-down to select the metric to monitor, and the Is field to specify the metric's value for comparison. To prevent false positives, alerts for the metrics iNode Status, Remote Network Connection, Service Status, iNode IP Address Change, and iNode Metrics will be triggered once the condition is true for at least 1 minute. Use the For field if you want to change this duration.
- Specify the target resource whose alert condition you want to evaluate:
Select Scope as Org: If you select the Scope as Org and the Organization as My org, the alert condition will be evaluated for all target resources in your organization. If you have child organizations and want the scope to include them, select the Scope as Org and the Organization as My org and my child orgs. (For more on creating and managing child organizations, see Managing an Organization.)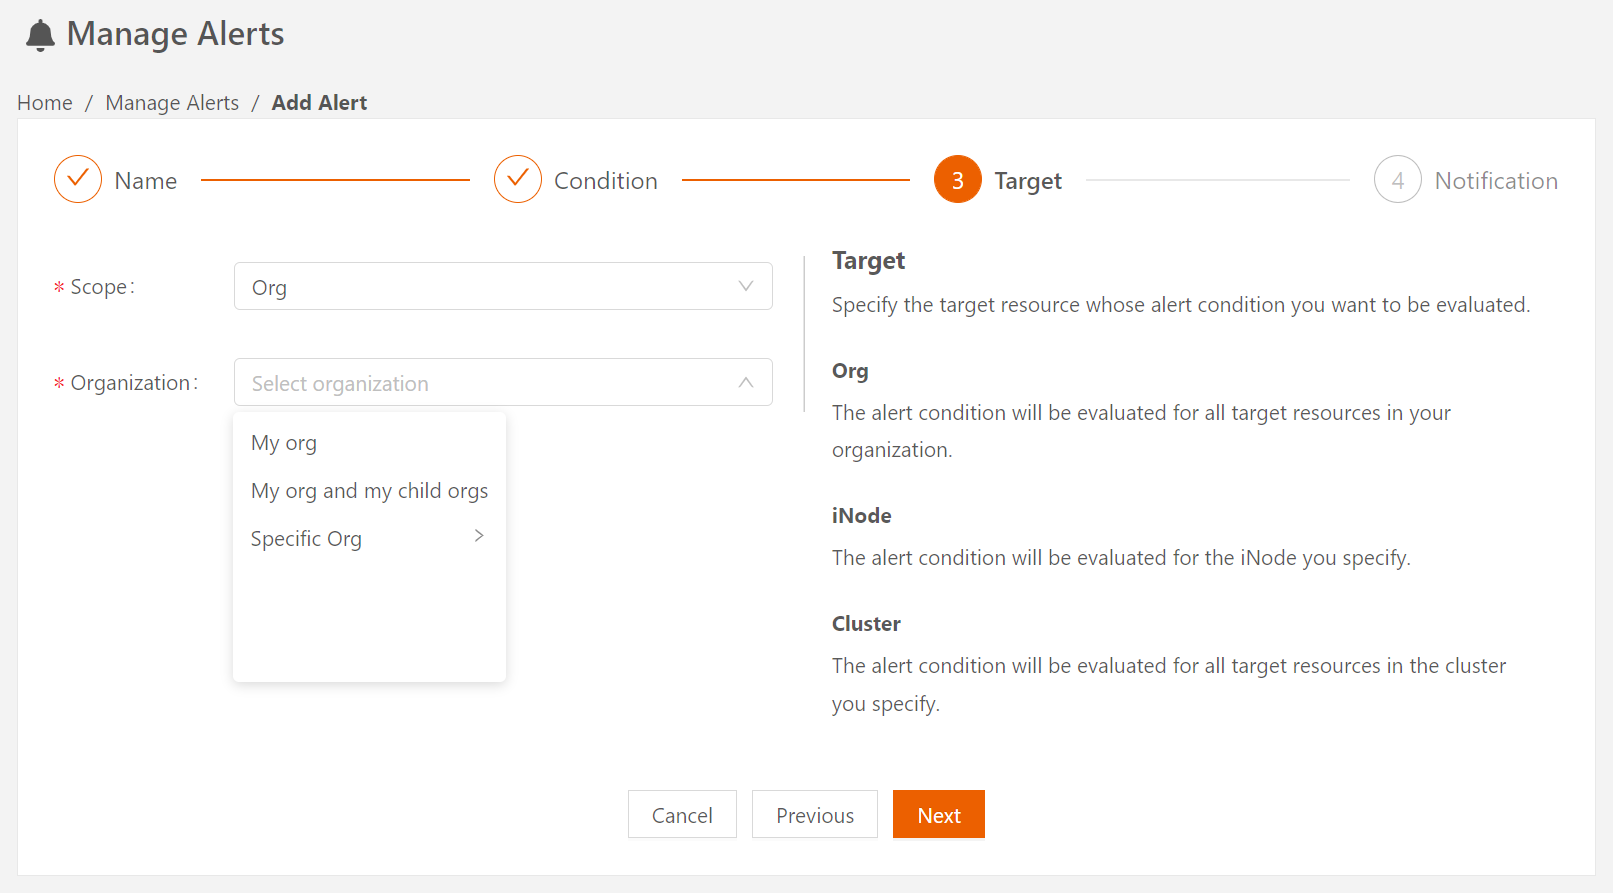 OR,
OR,
Select Scope as iNode: You can select the Scope as iNode and specify the target resource of a specific iNode. If you want a group of iNodes, select Scope as iNode, and then Select by Label and select the label from the available labels or Add Label.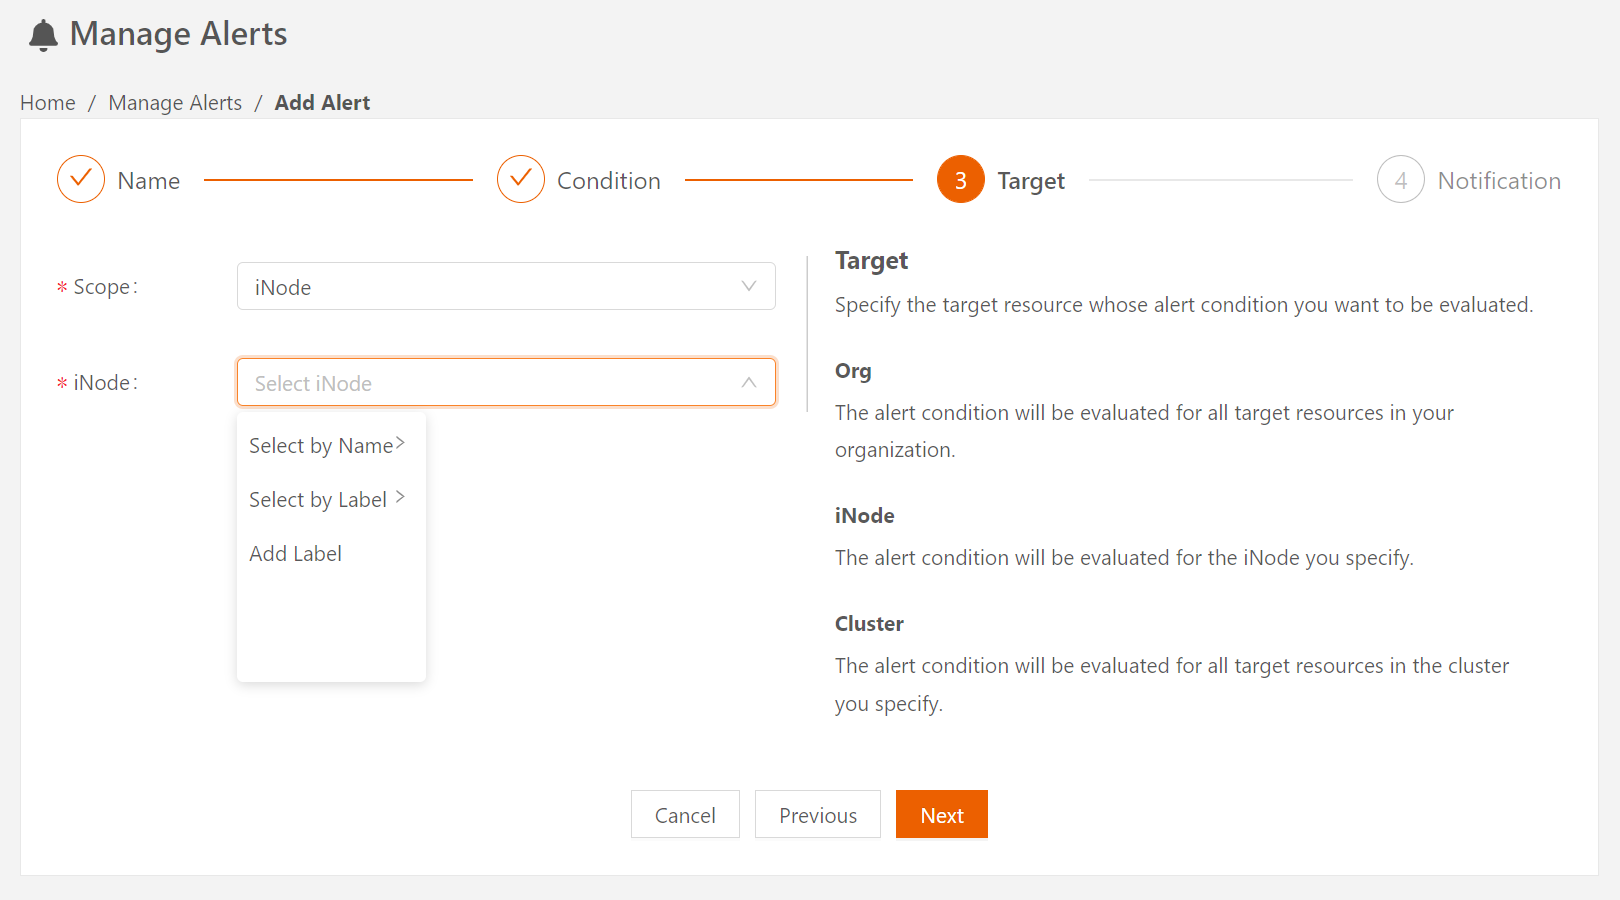
- Select Next to specify how to be notified when the alert is triggered. Select an option:
- Notification Email: The notification is sent to the email address of the currently logged-in user.
- Webhook. The webhook notification is sent to the configured HTTP URL in the webhook.
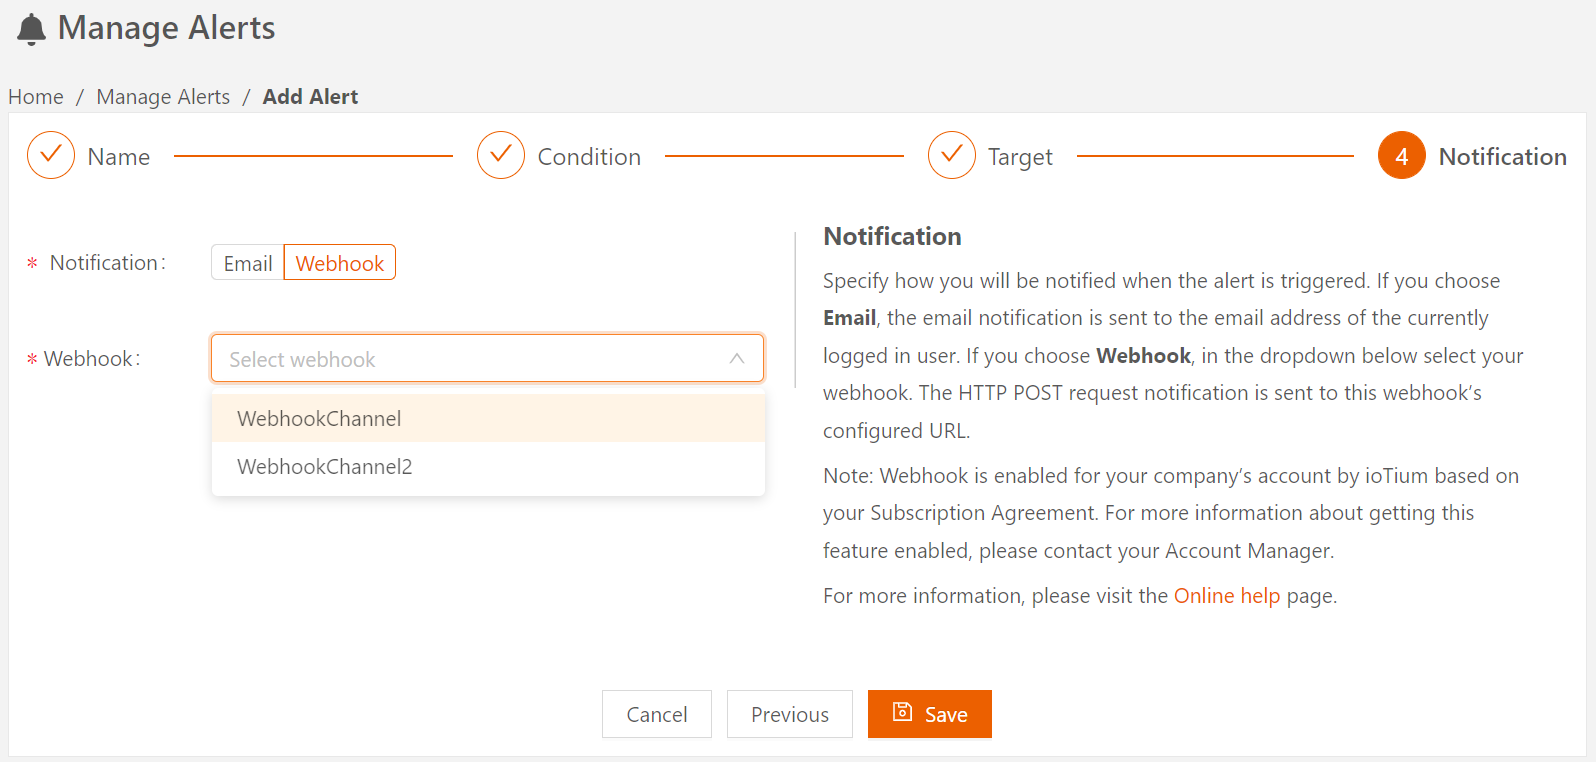
- Select Save to add the alert. Once the alert is successfully added, you can see it listed in the Manage Alerts page.
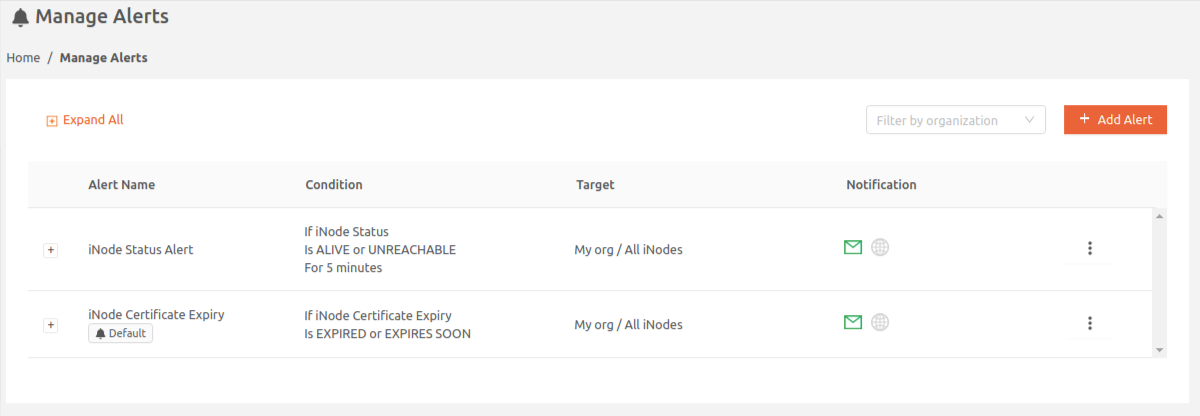
- Select the View icon to view the alert.
- Select the Edit icon to edit the alert. You can edit fields other than the If drop-down and notification details of the alert.
Alert Notification Email
You’ll receive alert notifications by email from [email protected].
Following is a sample of an alert email notification.


 After you add and verify a new webhook, it appears on the Manage Webhooks page.


 OR,
OR,


