- 02 Nov 2023
- 10 Minutes to read
- Print
- DarkLight
Using iNode Clusters
- Updated on 02 Nov 2023
- 10 Minutes to read
- Print
- DarkLight
In section, learn how to use the Secure Edge Portal to configure an iNode cluster to achieve high network availability on Edge iNodes.
Introduction to iNode Clusters
An iNode cluster is a group of Edge iNodes, that, together, offers high availability capability with stateful failover to eliminate the Edge iNode as a single point of failure. An iNode cluster provides a single point of provisioning for the group of Edge iNodes. You can use clusters to deploy iNodes for mission critical applications.
Two or more Edge iNodes can act as a cluster with one iNode in a master role and one or more iNodes in a backup role. The master and backup iNodes inherit the configuration settings you specify at the cluster level. When the master fails, a backup automatically takes over the master role.
iNode cluster achieves high availability. The first step is the election of a master. When you add an iNode to a cluster, you specify whether that iNode should be a candidate in the mastership election or not. If it is a candidate, you also specify a priority value. The candidate with highest priority (or highest IP address if candidates have the same priority) gets elected as the master. All other candidate iNodes listen for heartbeats sent by the master to indicate that it is still alive. If the master stops sending the heartbeats, the mastership election happens again and another candidate iNode with next highest priority becomes the master. iNodes in the cluster that are not candidates will not participate in the mastership election.
The clustering mastership election can be run either on the WAN or TAN network. You can choose this when creating the cluster and the default is WAN network. All the candidate iNodes must be connected to the network that is chosen for the clustering mastership election. If you choose TAN network for mastership election, then one of the TAN networks must be configured as the network for clustering mastership election.
Here are the configuration settings that you specify at the cluster level, and that are inherited by each iNode in the cluster:
- Local network - Network addressing, master IP address, default destination, remote networks, static routes, and security policy.
- The following settings are applicable only to the master - Master IP address, Default destination, and Remote networks.
- Rest of the settings are applicable to all iNodes in the cluster.
- Services - While services are specified at the cluster level, you can control which services run on which iNodes in the cluster, based on the Kind parameter:
- Daemon - One instance of the service runs on all iNodes in the cluster.
- Replica - One instance of the service runs on a set of iNodes that you select using labels.
- Singleton - One instance of the service runs only on the master iNode. If the master fails, it runs on the iNode that gets elected as the new master.
The following figure illustrates an iNode cluster.
 Figure 6. An iNode Cluster Example
Managing iNode Clusters
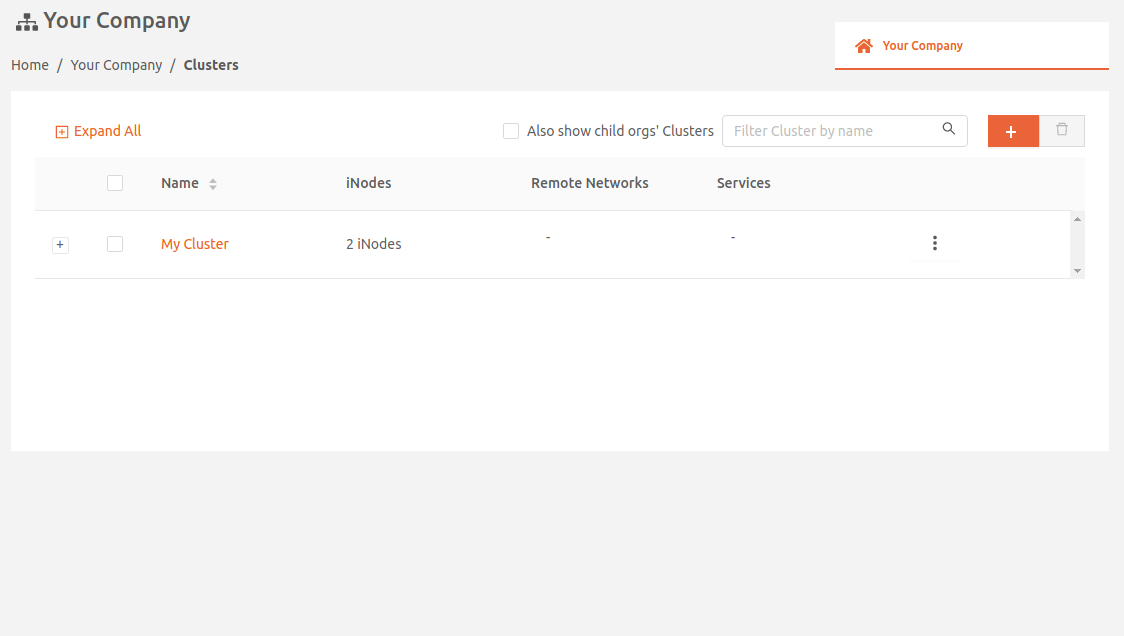
From Clusters on the Dashboard left navigation menu, access the Clusters page where you can view a list of clusters in the Org.
From this page, you can:
- Provision an iNode cluster
- Create an iNode cluster
- Configure network type for clustering mastership election
- Add Edge iNodes to the cluster
- Add a local network to the cluster
- Add multiple local networks to the cluster
- Add services to the cluster
- View details about clusters
Provision an iNode Cluster
Create an iNode Cluster
To create a cluster, you give it a name, unique within your Org, and add Edge iNodes. Requirements of any Edge iNodes you add to a cluster include:
- It must not have a local network of its own
- It must not be a member of another cluster
Follow these steps to create a cluster:
- From the Clusters page in the Secure Edge Portal, select the plus sign (+) on the top right to display the Add Cluster page.
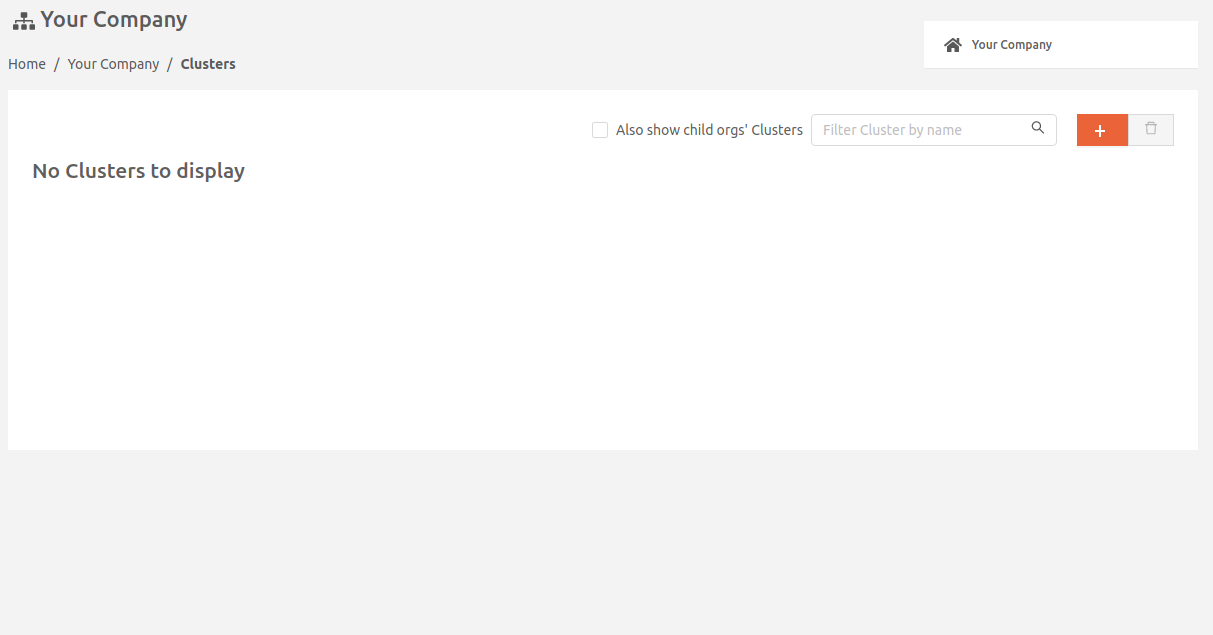
- On the Add Cluster page, add a name to identify the cluster.
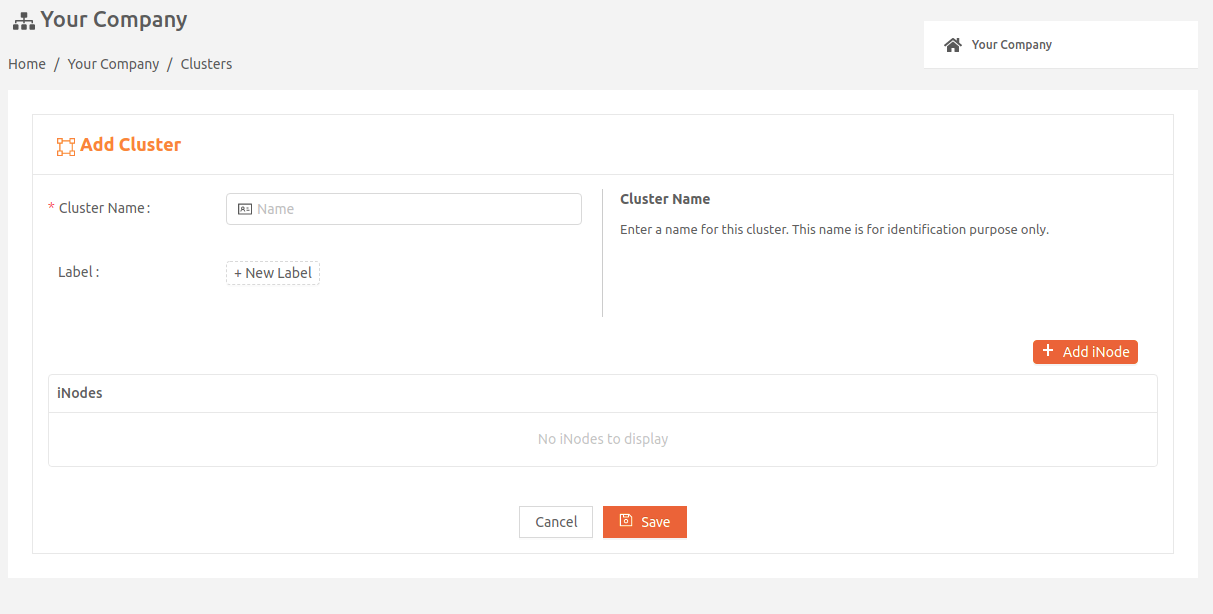
Configure Network Type for Clustering Mastership Election
- By default, the network type to run clustering mastership election is set to WAN.
- If you want to change it to TAN, expand Advanced Settings and set Network Type for Clustering Mastership Election: to TAN.
- This field can be changed only if there are no iNodes in the cluster.
Add Edge iNodes to the Cluster
- Expand the iNodes panel to select the Edge iNode to add to the cluster.
- If you want the Edge iNode you're adding to be a candidate in the mastership election, select the Candidate checkbox. The Secure Edge Portal adds the label Candidate to this Edge iNode for you. Note that the number of candidates per cluster is limited to 3.
- In the Priority field, specify this candidate's priority for getting elected as the master. The higher the number, the more likely the candidate iNode will be elected master. You can specify a number 1 through 254 (1 is the lowest priority and 254 is the highest). The default value is 100.
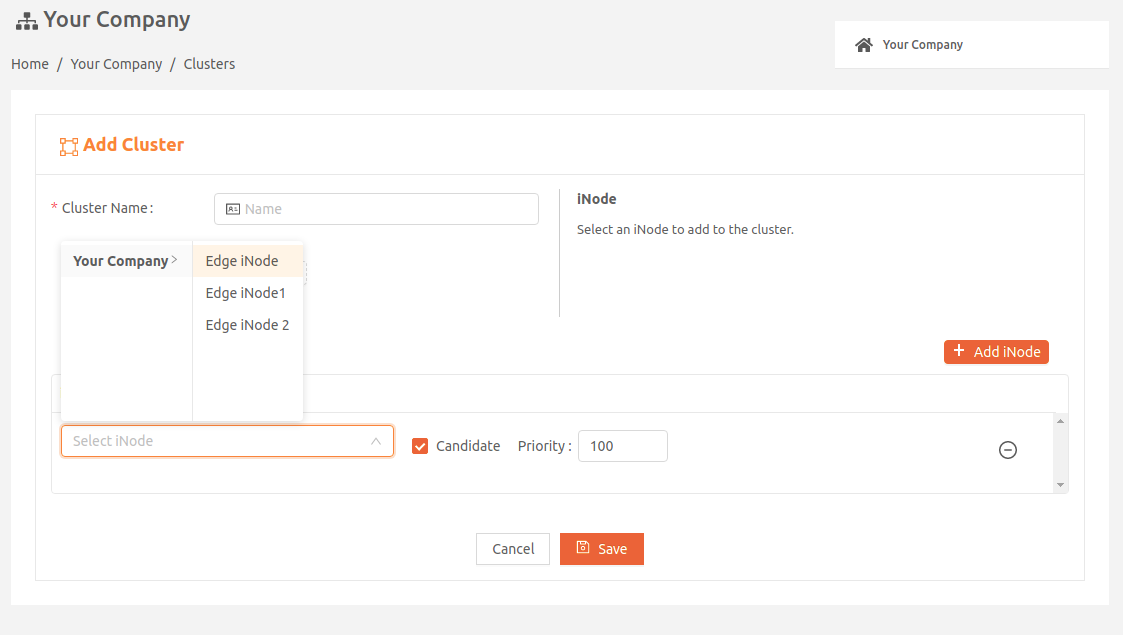
- You can add up to 32 Edge iNodes per cluster. When you’re done, select Save.
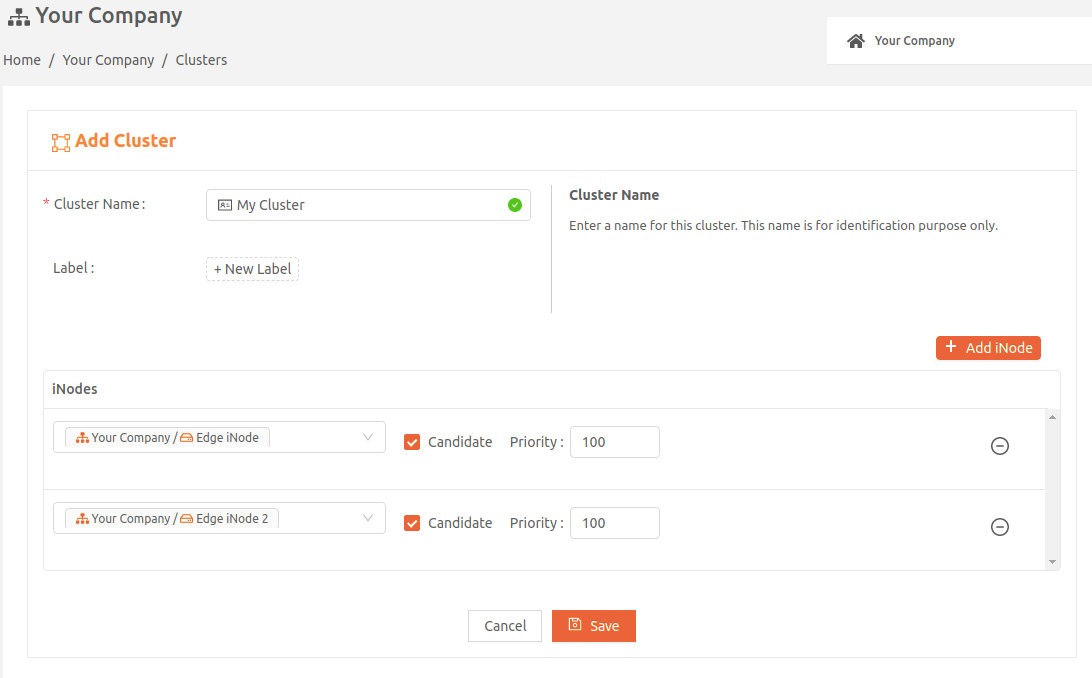
- After you’ve created the cluster, go to the Clusters page to verify that it’s listed there.
Add a Local Network to the Cluster
After you’ve created a cluster and added Edge iNodes, you’ll need to add a local network for the cluster.
If the network type for clustering mastership election is set to TAN, we support only static networks for the cluster. For WAN network type, we support both static and DHCP networks for the cluster.
The local network you add at the cluster level is inherited by each iNode in the cluster. You can't change the inherited local network in the clustered iNodes. Neither can you add additional local networks in the clustered iNodes.
If the local network you add at the cluster level includes a remote network to connect to, the actual remote network connection would originate from the master iNode. If the master iNode fails, the remote network connection would be automatically reestablished from the iNode that gets elected as the new master.
In addition, using a Custom Security Policy to control traffic within a local network is not supported for cluster networks. If both From Network and To Network are resolved as "local network" for a rule, the rule has no effect for a cluster network.
To create a local DHCP network for the cluster, follow these steps:
- From the Dashboard, select Clusters > Clusters page.

- Select the name of the cluster to display its cluster details page.
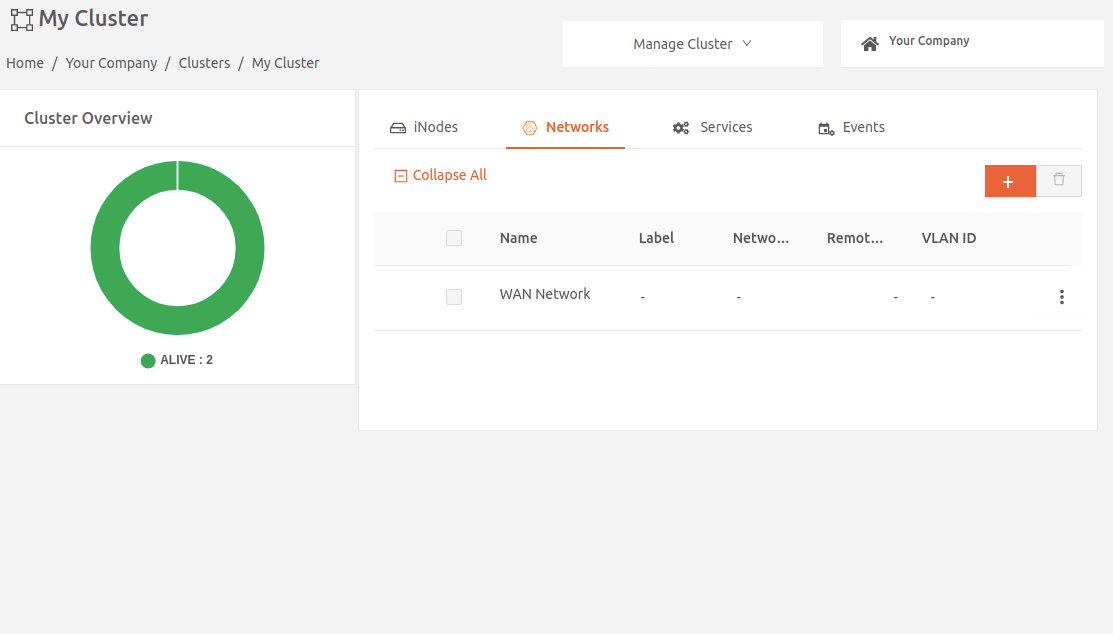
- On the Networks tab of the cluster details page, select the plus icon ( + ) to display the Add Network page.
- Select the name of the dynamic network you’d like to add to the cluster.
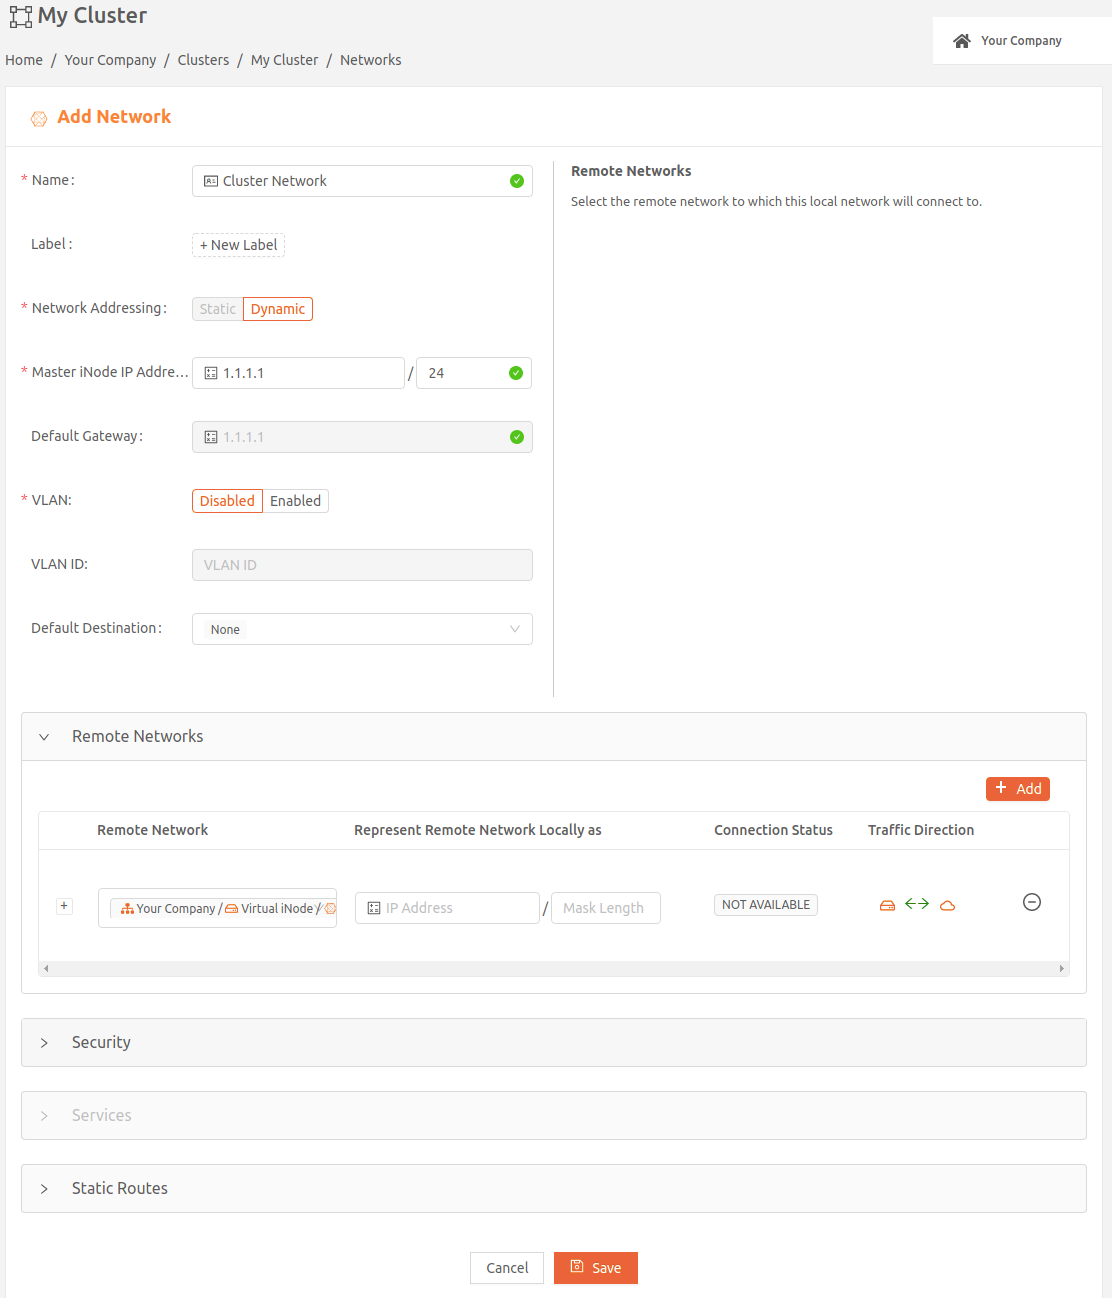
- Supply the Master iNode IP Address. This auto-populates the Default Gateway.
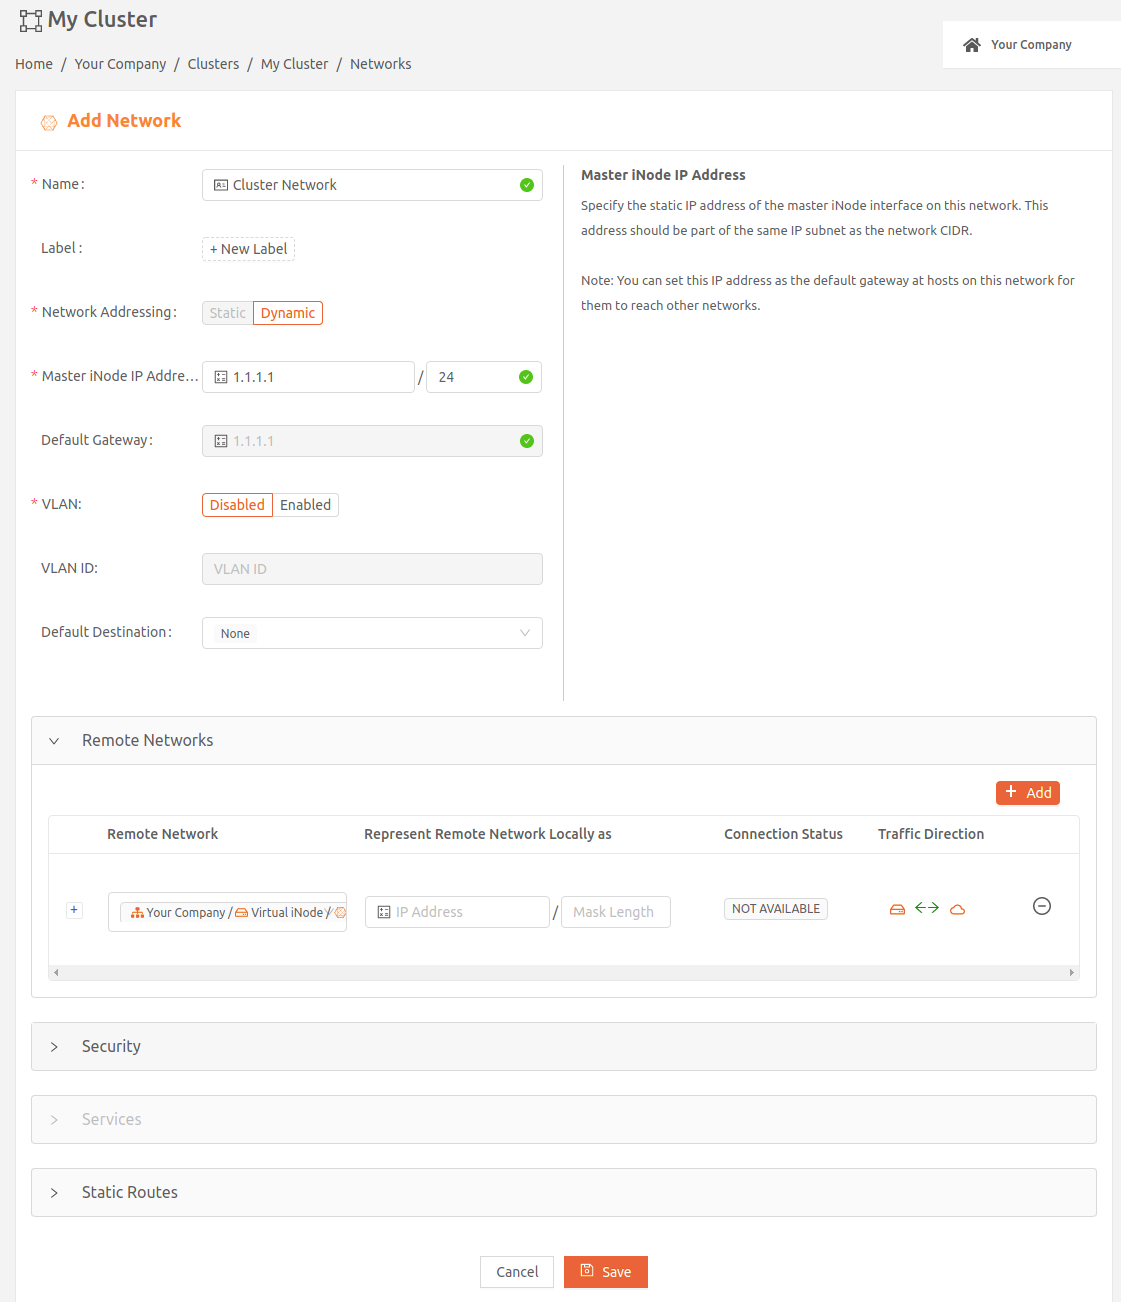
- Select Save. Once you’ve added the local network to the cluster, you’ll see its details on the cluster details page.
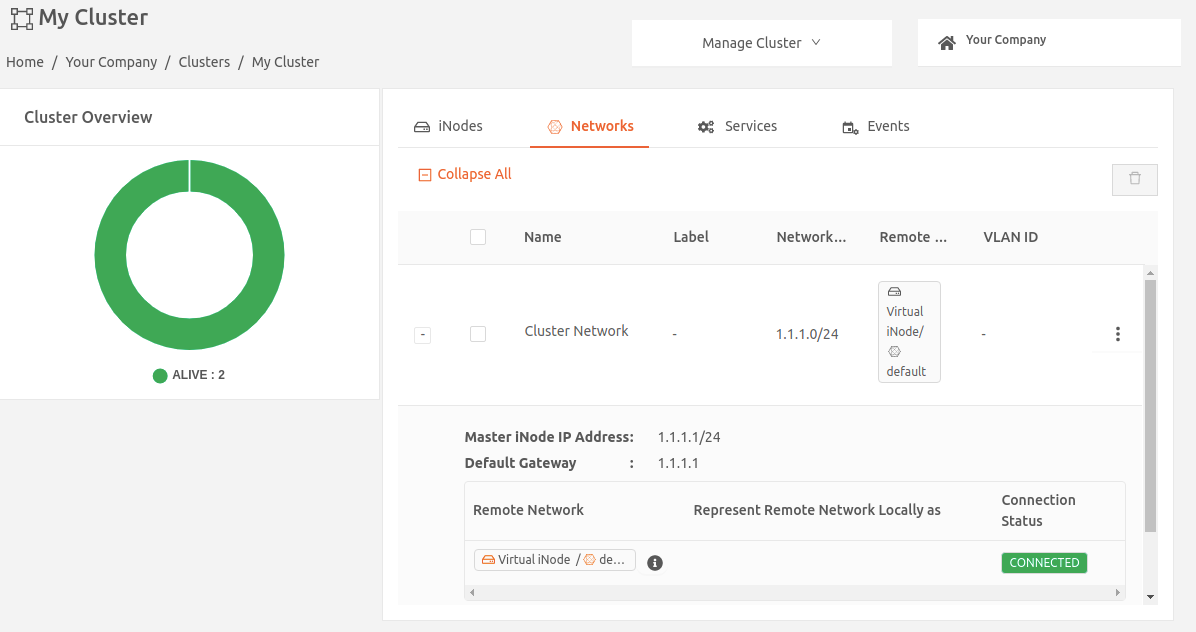
To create a local static network for the cluster, follow these steps:
- From the Dashboard, select Clusters > Clusters page.
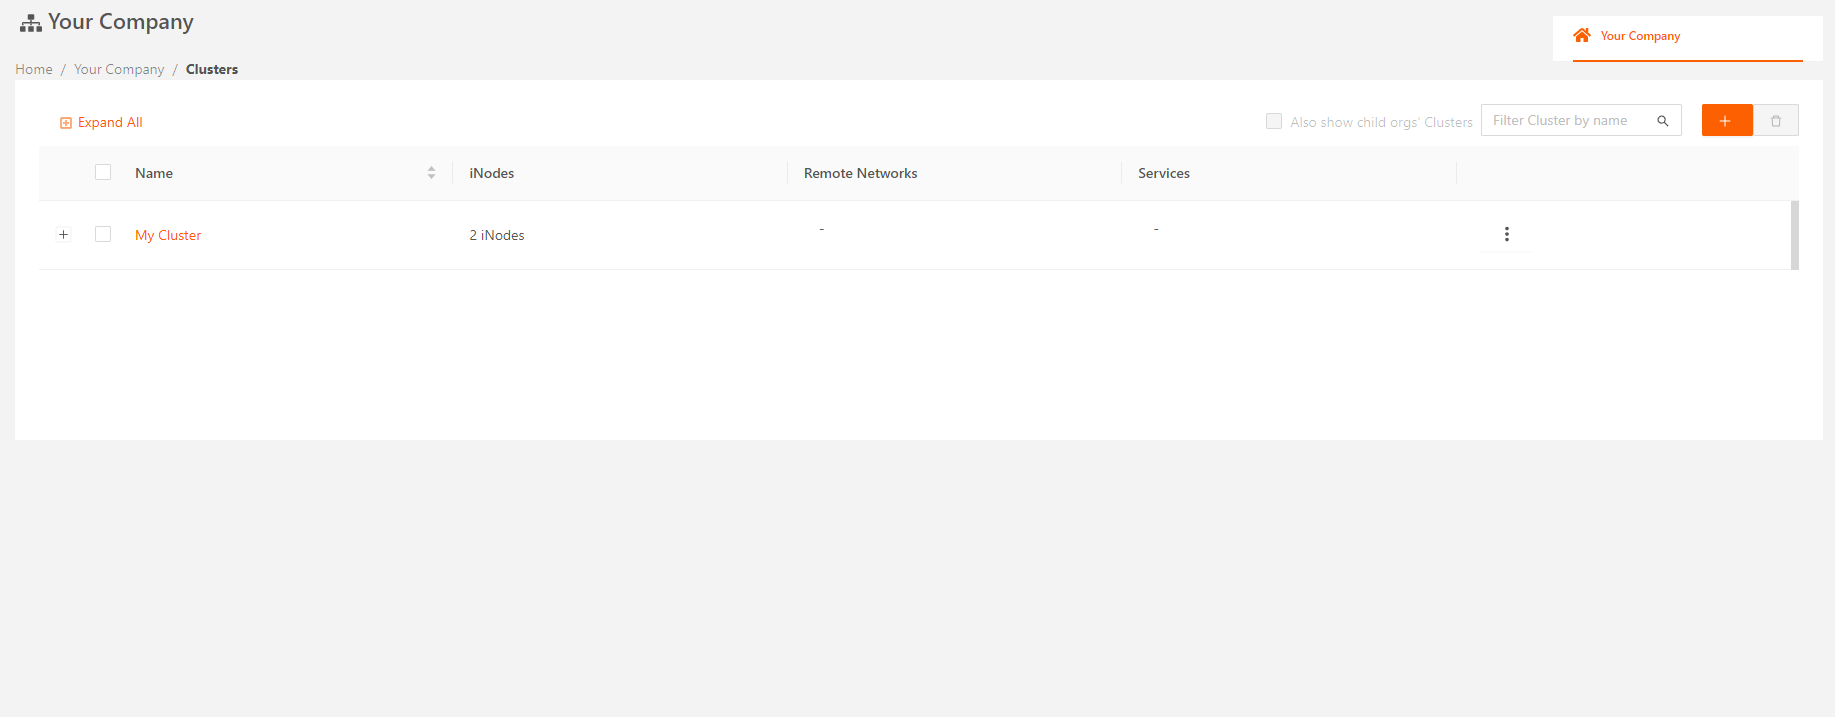
- Select the name of the cluster to display its cluster details page.
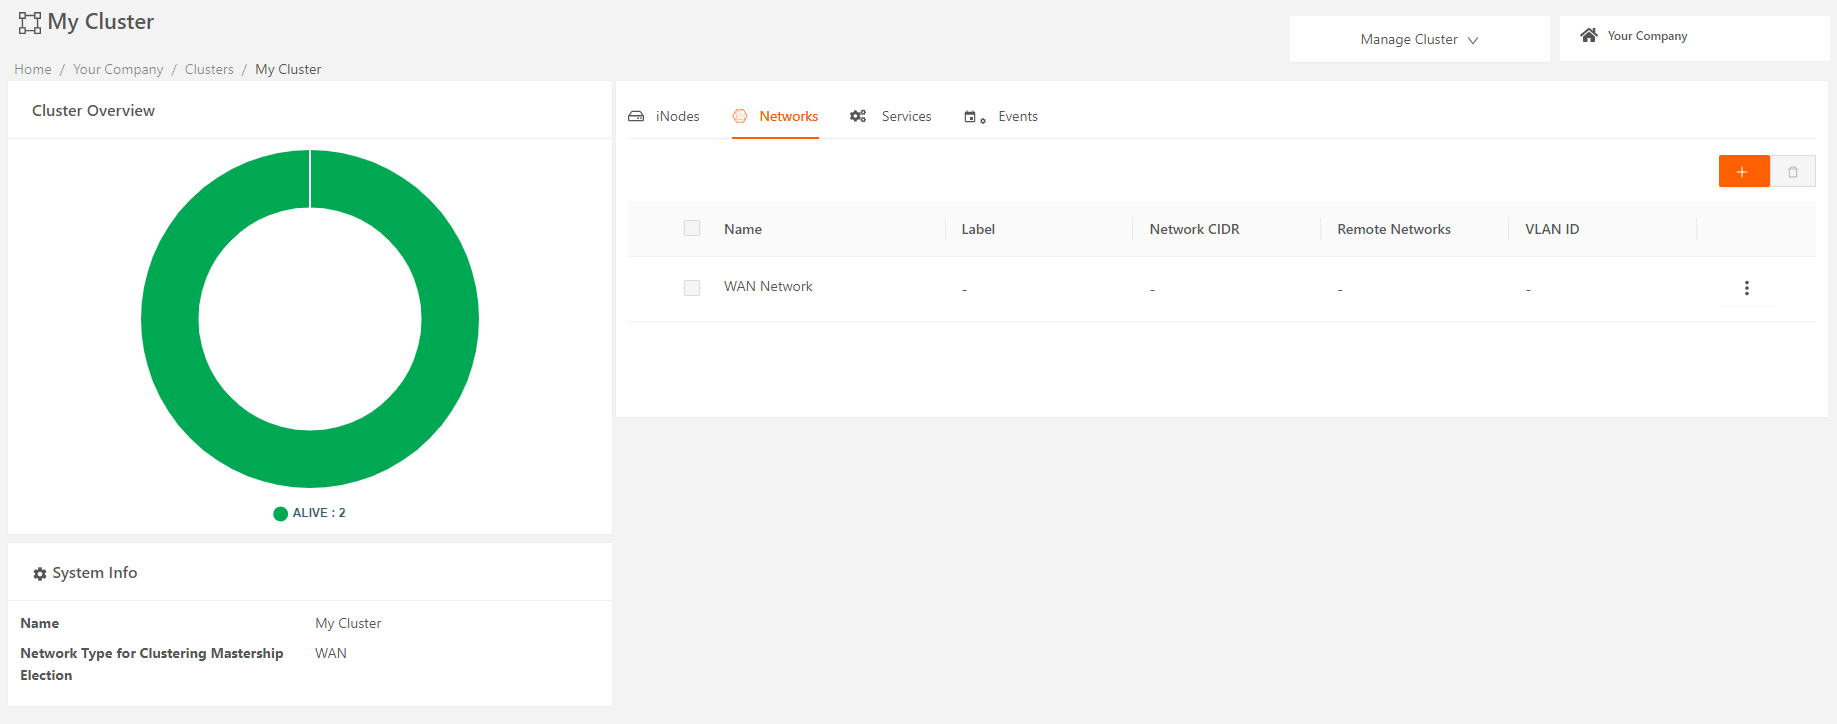
- On the Networks tab of the cluster details page, select the plus icon ( + ) to display the Add Network page.
- Select the name of the static network you’d like to add to the cluster.
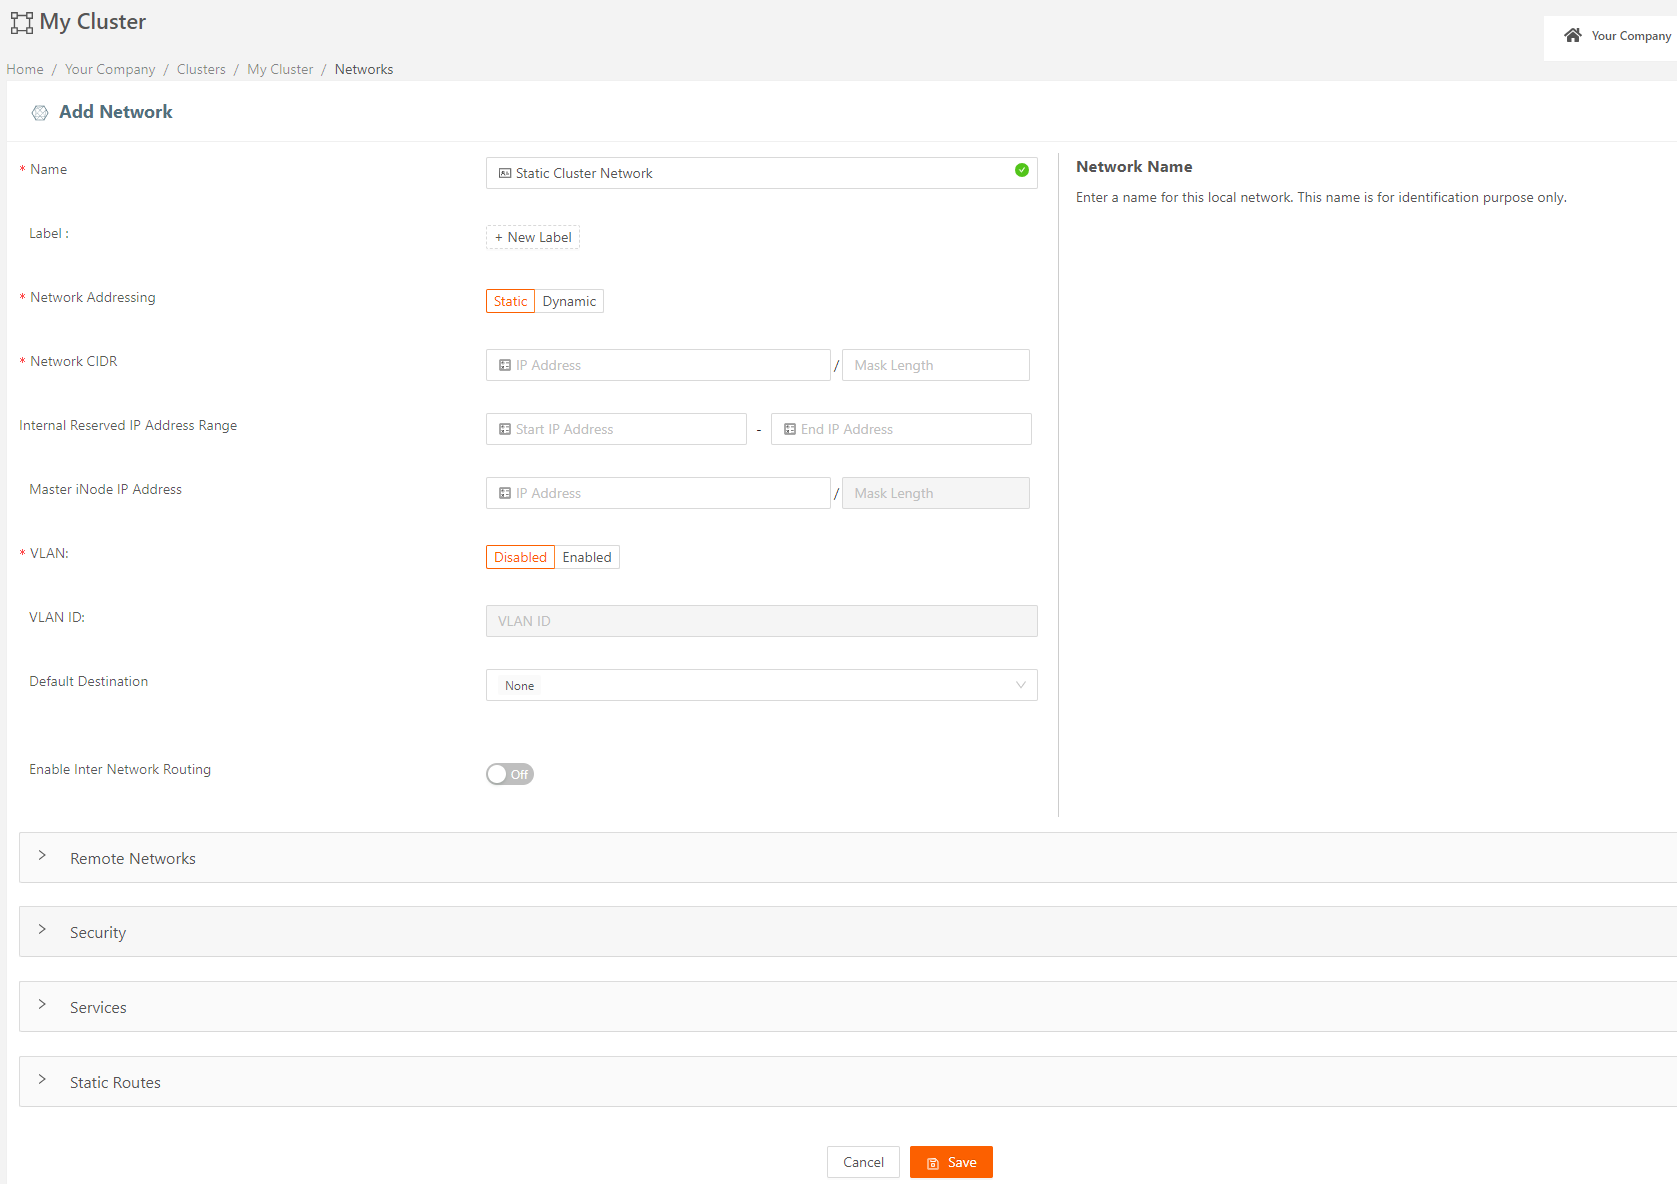
- If the Networking Addressing for this network is to be static, the hosts in this network must be manually configured with static IP addresses. Select Static for Network Addressing.
- Specify the network’s CIDR in the Network CIDR field.
- Specify a range of IP addresses (at least one) that will be reserved for cluster internal use. These IP addresses must be part of the same IP subnet as the local network’s CIDR.
- Specify the IP address of the master iNode interface on this network in Master iNode IP Address. This is an optional field. If you don’t set it, the start IP address configured in the previous step will be the IP address for the master iNode and the default gateway for devices on this network. If you set Master iNode IP Address, it will be the default gateway.
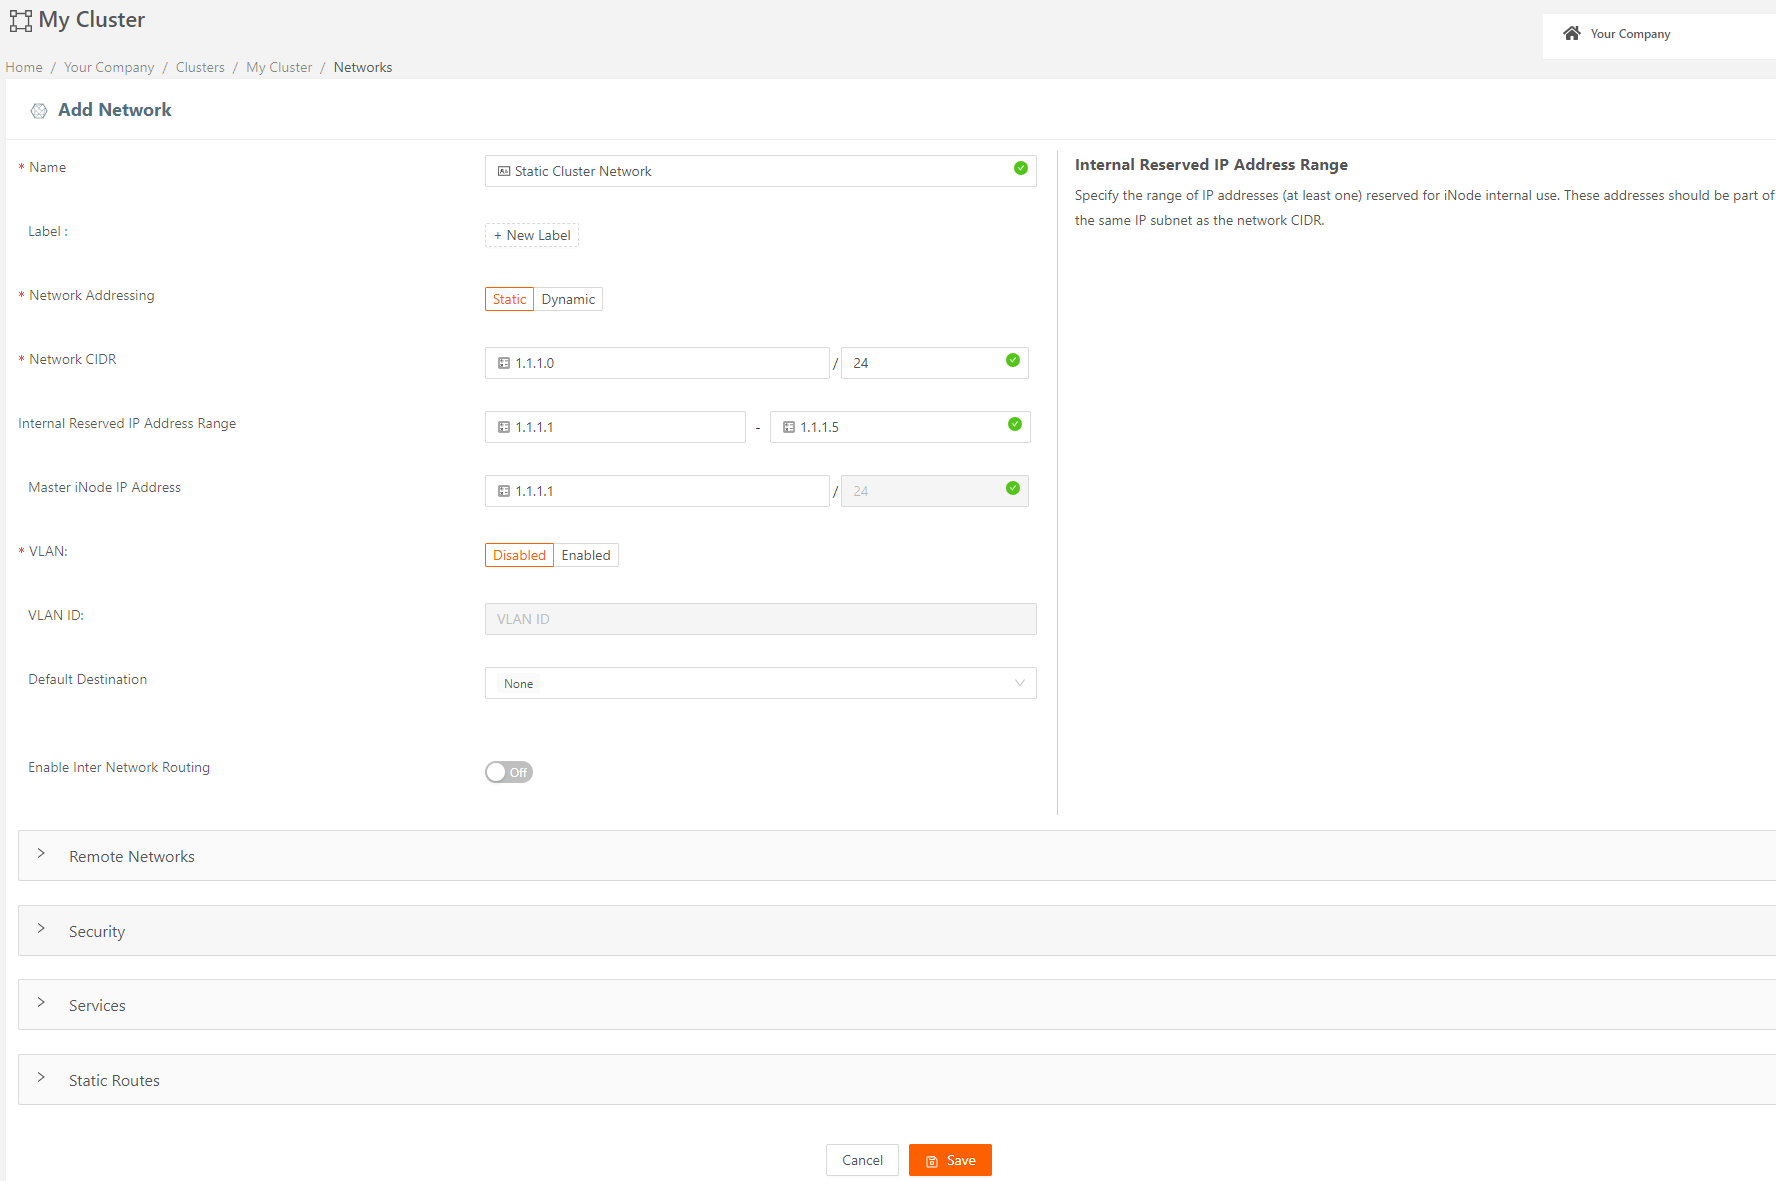
- Select Save. Once you’ve added the local network to the cluster, you’ll see its details on the cluster details page.
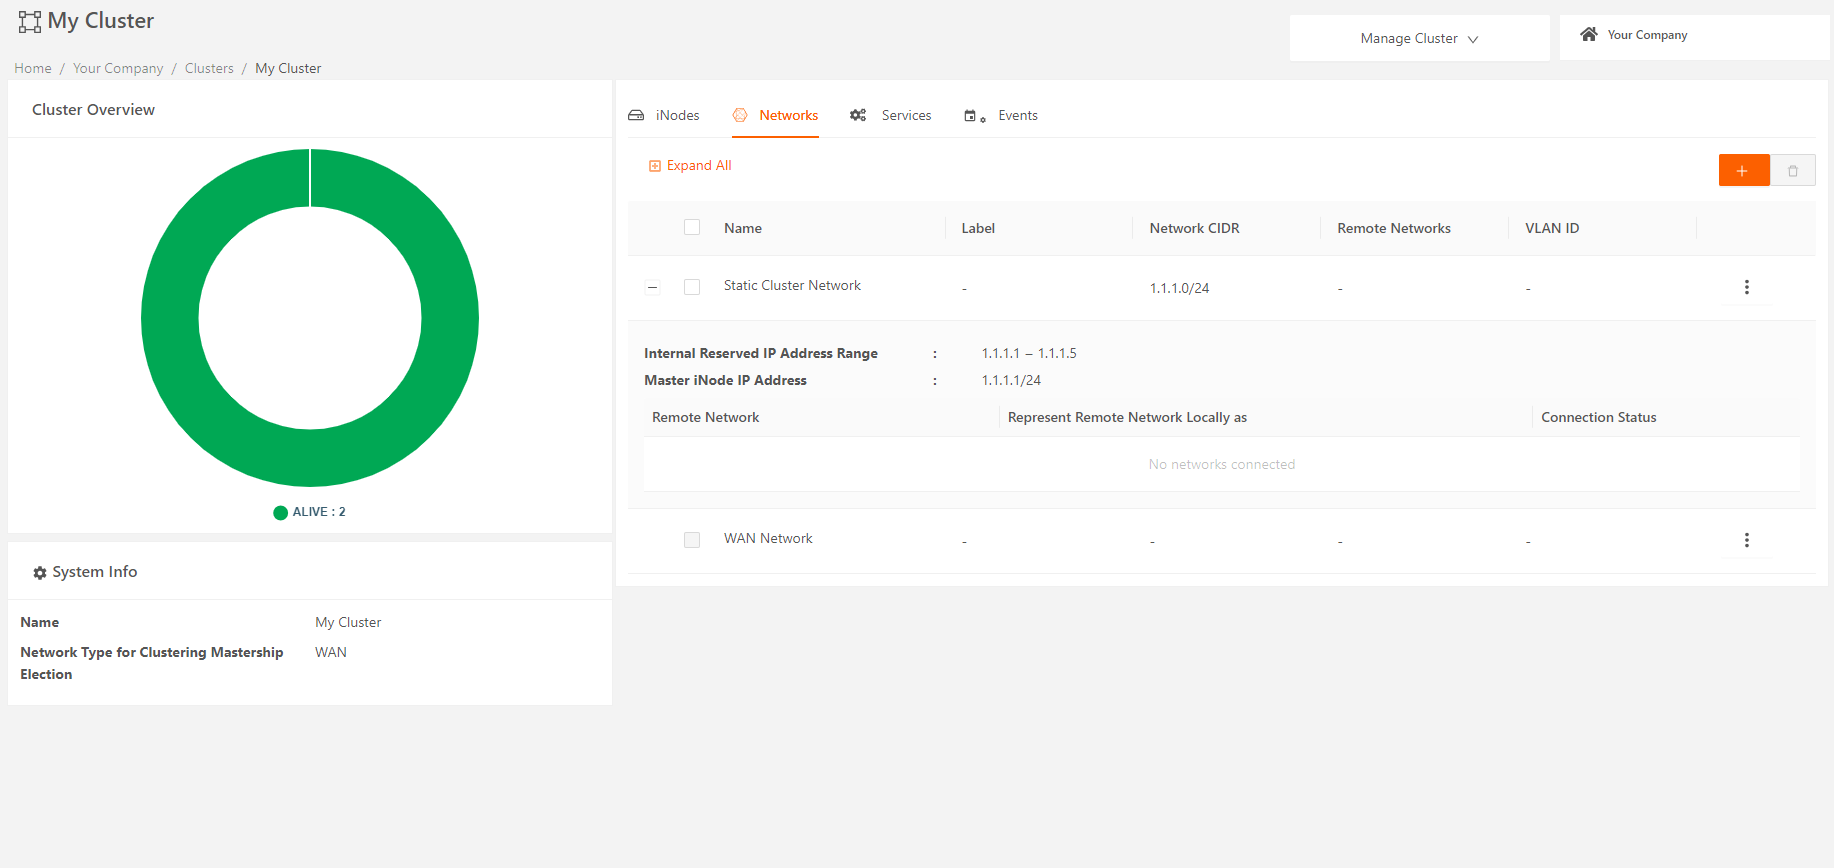
Add Multiple Local Networks to the Cluster
Multiple local network support is available only for Static network type. If you want to add more than one local network to your cluster, all the networks should be of Static type. For adding additional static local networks, follow the steps in the previous section for creating a local static network for the cluster.
Configure high availability on clusters
You can configure high availability on your clusters to enable automatic master switchover on WAN or TAN interfaces and maintain service availability during link outages. Use the following steps to enable high availability for cluster.
- From the Clusters page, select the cluster you want to modify.
- From the Manage Cluster drop-down menu (top-right), select Edit > Advanced Settings.
- Set the High Availability for Interface Failover toggle switch to On.

Add Services to the Cluster
Running edge services on a cluster is similar to running them on an iNode. For a cluster, you'll also need to specify how you want to run the service on the cluster ' as a daemon, replica, or singleton.
To deploy an iNode cluster in the real world, you'll also need infrastructure services such as DHCP server, DNS server, NTP server, etc. We provide a collection of core infrastructure services that may be available for your company's account based on your Subscription Agreement. See Secure Edge Core Services for more information.
View Details About Clusters
You can view details about clusters, including cluster status, iNode status, and associated networks and services, on the cluster details page.
To view cluster details, select the cluster name on the Clusters page.

A services view of a specific cluster is shown below:

Convert a Single Edge iNode to Cluster
In the previous section, we saw how to create an iNode cluster and add Edge iNodes to it. In that flow, the Edge iNode that is added should not have any local network and services. After addition to the cluster, the iNode will inherit the configuration from the cluster.
In this section, learn how to use View Secure Edge to convert a single Edge iNode to cluster without losing the existing configuration in the iNode. This will create a new cluster, configure the cluster with the same values as the single Edge iNode, and add the iNode to the cluster. After the conversion, the Edge iNode in the cluster will still have the same set of local networks and services that it had when it was single Edge iNode.
- This conversion is supported only if the Edge iNode that is being converted has only static local networks.
- After conversion to cluster, if the Edge iNode is removed from the cluster it will not have any configuration.
- Whenever you convert an edge iNode to a cluster, the iNode reboots.
Follow these steps to convert a single Edge iNode to cluster:
- From iNodes > All iNodes page, select the iNode name to display the iNode details page.
- On the Manage iNode dropdown menu (top-right), select Convert To Cluster to display the Create Cluster page.

- On the Create Cluster page, add a name to identify the cluster. By default, Network Type for Clustering Mastership Election is set to WAN and you can change it to TAN if required. When you’re done, select OK.
A confirmation dialog displays to remind you that converting to cluster reboots the iNode.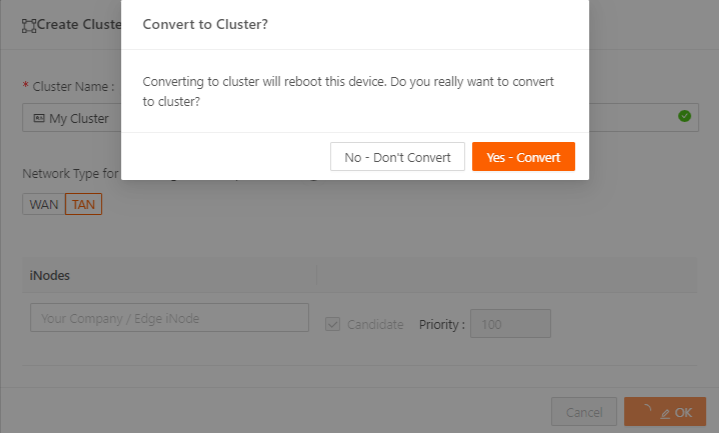
- Select Yes - Convert to continue the cluster creation. The iNode reboots.
- After you’ve created the cluster, go to the Clusters page to verify that it’s listed there.
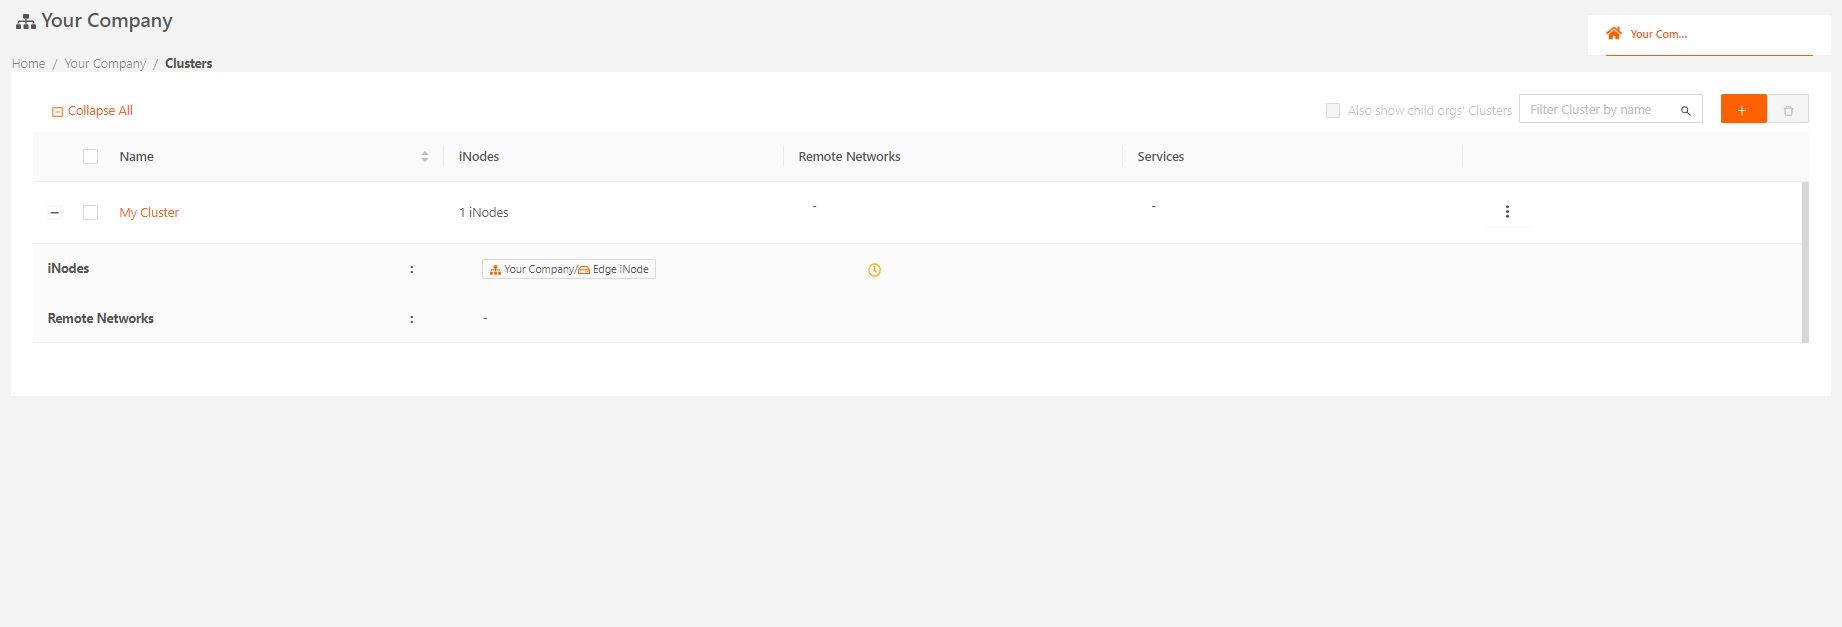
After the cluster is created, you can add more Edge iNodes to the cluster to achieve high availability.
Cluster Design Recommendations
- Spread redundant iNodes across independent hardware.
- If you have standalone iNodes on the same local network as an existing cluster, consider adding them as non-candidate iNodes to the cluster. This reduces management complexity by combining the local network configuration settings of all the standalone iNodes into a single cluster level configuration.
Troubleshooting Cluster Issues
- Cluster Heartbeats use multicast for master failure detection. Please make sure that your switch connected to your iNode cluster's WAN network does not filter, rate limit, or otherwise interfere with multicast traffic. Otherwise, failovers may not happen when they should, or get delayed.
- Please make sure that more than one iNode cluster is not using the same WAN network. Otherwise, you may notice there is no master in a cluster, or wrong cluster level configuration settings being applied to iNodes in a cluster.
- Automatic failover in clusters can mask a master iNode failure since you may not have a service disruption. However, since redundancy is affected it is important to monitor the health of the cluster. Currently the only way to monitor failover is to check for the failover event in the Portal.


